❌

Normal view

There are new articles available, click to refresh the page.
Before yesterdayTechncyber

How to use Nmap in termux

By: Basudev
21 December 2022 at 21:33

NMAP (Network Mapper) is a free and open-source network scanning tool widely used by network administrators and cybersecurity professionals to discover and map devices on a network. It can scan a range of IP addresses or a single host to identify the services and operating systems running on it. In this article, we will discuss how to install and use NMAP in Termux.

nmap in termux


Installing NMAP in Termux

1. Open Termux on your Android device and update the package repository by running the following command:

pkg update && pkg upgrade -y

2.Β Install the Nmap package by running the following command:

pkg install nmapΒ 

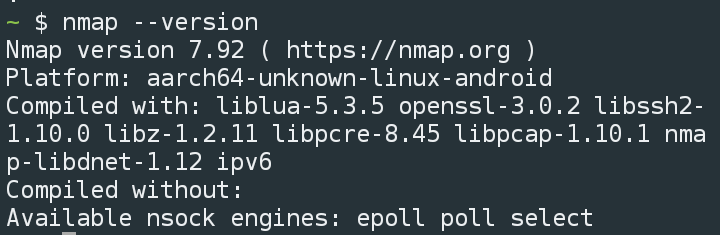
3.Β To verify the installation, you can run the nmap command with the --version option

nmap --versionΒ 

nmap in termux


Using NMAP in Termux

NMAP provides a wide range of options for scanning networks and hosts. Here are a few examples of how to use NMAP in Termux:


Scanning a range of IP addresses

To scan a range of IP addresses, you can use the -sL option followed by the range of IP addresses you want to scan. For example, to scan the range 192.168.1.1-255, you can use the following command:

Β nmap -sL 192.168.1.1-255

This will list all the IP addresses within the specified range.

Scanning a single host

To scan a single host, you can use the -sV option followed by the hostname or IP address of the host you want to scan. For example, to scan the host www.example.com, you can use the following command:

nmap -sV http://scanme.nmap.org/

This will scan the specified host and report the services and operating system running on it.

Scanning a range of ports

NMAP can also be used to scan a range of ports on a host. To do this, you can use the -p option followed by the range of ports you want to scan. For example, to scan the range of ports 1-1000 on the host www.example.com, you can use the following command:

Β nmap -p 1-1000 www.example.com

This will scan the specified host and report the status of the ports within the specified range.


Performing an OS detection scan

NMAP can also be used to detect the operating system of a host. To do this, you can use the -O option followed by the hostname or IP address of the host you want to scan. For example, to detect the operating system of the host www.example.com, you can use the following command:

nmap -O www.example.com


This will scan the specified host and attempt to detect the operating system running on it.

Also Read:


Conclusion

In this article, we have discussed how to install and use NMAP in Termux. NMAP is a powerful and versatile tool that can be used to scan networks and hosts to identify the services and operating systems running on them. By following the steps outlined in this article, you can easily install and use NMAP in Termux on your Android device.Β We have a comprehensive nmap tutorial

How to install and use the Nano text editor in Termux.

By: Basudev
20 December 2022 at 22:09

GNU nano is a simple terminal-based text editor, used in command line to edit, create small text files, its similar to VIM but not that powerful and it can be good for making small changes in text files through the command line

nano in termux


Today in this post, you will learn how to install and use nano text editor in termux

Follow these steps to get started

1. Download and install Termux from Fdroid

2. Open Termux and type the below commands

apt update && apt upgrade

3. Now install the nano package by typing

pkg install nanoΒ 

4. After that you can check its version by typing

nano --version

Nano in termux


5. Now you are ready to use nano

Creating a file with nano

Type below command to create a new text file

nano test.txt

Nano editor


it will create a new file test.txt if not exists


Now write there and to save and exit the nano pressΒ CTRL + X and Y then hit enter

This is the way you can use nano in termux and edit files

How to Install Golang in Termux

By: Basudev
16 December 2022 at 21:13

Goland or Go language is a popular open-source programming language developed by Google engineers, and it is one of the faster languages,Β 

In this tutorial, you will learn how to install glang in Termux step by step.

Before we begin, ensure that you have Termux installed on your Android device. You can download it fromΒ Fdroid. YouΒ should have some basic knowledge of termux commands

golang in termux

To install Golang in Termux, follow these steps:

1. Open Termux and update the package repository by running the following command:

pkg update && pkg upgrade -y

2. Install the Golang package by running the following command:

pkg install golang

3. Once the installation is complete, verify that Golang is installed correctly by running the following command:

go version

go version


You should see the version number of Golang displayed in the output.


4. To set the environment variables required for Golang to work properly, run the following commands:

export GOPATH=$HOME/go

export PATH=$PATH:$GOPATH/bin

These commands will set the GOPATH variable to the go directory in your home directory and add the bin directory to the PATH variable.


5. You can now create a new Golang project by creating a directory for your project and running the following command:

go mod init <project name>

This will create a new Go module in the directory you specified.

6. You can start writing your Golang code in the project directory.

That's it! You have successfully installed Golang in Termux and can start building your applications.


Conclusion

Installing Golang in Termux is a simple and straightforward process. By following the steps outlined in this article, you can easily set up a development environment and start writing your Golang code on your Android device. Happy coding!

How to install and use Git in Termux

By: Basudev
15 December 2022 at 03:03

Git is a popular version control system that allows developers to track changes and collaborate on their code. This article will show you how to install Git in Termux So that you can use git on Android with a Linux-like terminal.

how to install git in termux


Before we begin, ensure that you have Termux installed on your Android device.Β 


To install Git in Termux, follow these steps:


1. Open Termux and update the package repository by running the following command:

pkg update && apk upgrade -y


2.Β Β Install the Git package by running the following command:

pkg install git

3.Β Once the installation is complete, verify that Git is installed correctly by running the following command:

git --version

Β 

Git version

You should see the version number of Git displayed in the output.

4.Β To configure Git with your name and email address, run the following commands:

git config --global user.name "<Your Name>"

git config --global user.email "<Your Email>"


This will ensure that your commits are correctly attributed to you.

5.Β You can now create a new Git repository by running the following commands:

mkdir <repository name>

cd <repository name>

git initΒ 

This will create a new directory for your repository and initialize it as a Git repository.Β 

6. You can add files to the repository and commit changes using the usual Git commands.

That's it! You have successfully installed Git in Termux and can now use it to manage your code repositories.


Conclusion

Installing Git in Termux is not that hard. You can configure your remote repository according to your git platform

How to install php in termux

By: Basudev
12 December 2022 at 22:07

Β Php is a popular scripting language for web development; Php is easy to use and has a simple syntax. In this article, we will show you how to install PHP in termux

Install php in termux


To install PHP in termux, follow the below steps carefully

1. Install Termux from F-Droid

2. Type the Below command to update the termux packages

pkg update && apk upgrade -y

3.Β  type the below command to install PHP

pkg install php

4. After successful installation, you can check the PHP version by typingΒ 

php --version

php version

5. Install nano, a text editor for terminal

pkg install nano

Β 6. Now Create a file test.php using nano and execute

nano test.php
Using nano

Save the file by CTRL +X ,Β Then execute it,

php test.php
php output

You will see the output.Β 

hope you guys learnt how to install and use PHP in termux. Also, read termux commands

How to Install nodejs in termux

By: Basudev
11 December 2022 at 21:54

Node.js is a powerful JavaScript runtime built on Chrome's V8 JavaScript engine. It allows you to run JavaScript on the server side, which can be used to create many applications, from simple command-line tools to complex web applications. This blog post will show you how to install Node.js on your Android device using Termux.

NodeJs in termux

You can install nodejs and npm in termux and build javascript applications. You can install express js, build web applications, build telegram bots and so on.

Install node js termux

To install Node.js on Termux, follow these steps:

1. First, open the Termux app on your Android device and update the package manager with the following command:

pkg update && pkg upgrade -y

2. Type the below command to install nodejs

Β pkg install nodejs

3. After successful installation, you confirm and can check its version by typing the below command

node -v
Nodejs

4. To run Node.js files/scripts, you can followΒ 

node script.js

where the script is the starting point of the app or a js file

npm will be automatically installed with node.js, you can use the node package manager by typing npm in termuxΒ 

How to install python in termux

By: Basudev
8 December 2022 at 21:33

In this tutorial, you will learn how to install python in termux and use python files on your android

What is Python?

Python is a programming language used to build software, websites, data analysis and so on. and it is one of the favourite programming languages for hackers.

python in termux

Install python on termux


Follow these steps to install python in termux. We will use nano to edit python files.

1. Download and install Termux from F-Droid

2. in termux type apt update && apt upgrade -y

3. Now type pkg install python

4. Then type pkg install nano

5. type python --versionΒ to check the version of python

install python in termux


How to run python in termux

Create a file with .py extension, then executeΒ python file.py

we will use nano to create a file

in the termux type

nano test.py

then write in the editor

print("Hello World")

Nano


Now Save the file by CTRL + X or Volume down + X

Now Run the file by typing

python test.py

Run python


Now you will notice Hello World is printed.

❌
❌