❌

Normal view

There are new articles available, click to refresh the page.
Before yesterdayHowToBBBQRight

BBQ Pork Tenderloins

2 June 2026 at 12:51

BBQ Pork Tenderloins

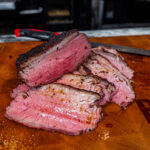
This BBQ Pork Tenderloin is loaded with flavor and stays incredibly juicy thanks to a simple apple juice brine and a two-zone grilling method. Finished with a sweet, sticky glaze over the coals, it’s just as good sliced thick for dinner as it is piled onto slider buns with slaw.

WHAT MALCOM USED IN THIS RECIPE:

Β 

Print

BBQ Pork Tenderloins


5 Stars 4 Stars 3 Stars 2 Stars 1 Star

No reviews

Description

ender, juicy, and finished with a sticky BBQ glaze, this BBQ Pork Tenderloin is proof that pork doesn’t have to be dry. A simple apple juice brine and two-zone fire deliver incredible flavor from edge to edge.


Ingredients

  • 4 pork tenderloins (about 4 to 6 lbs total)
  • Β½ bottle Malcom’s Bird Brine
  • ΒΌ cup Killer Hogs The BBQ Rub
  • 64 oz apple juice
  • Killer Hogs Hot Rub, as needed
  • ΒΎ cup Killer Hogs The BBQ Sauce
  • ΒΌ cup Gulf Coast Smoke Cherry Pineapple Glaze
Instructions

  1. Brine the Pork
    1. In a large food-safe container, combine Malcom’s Bird Brine, Killer Hogs The BBQ Rub, and apple juice. Stir until dissolved.
    2. Add the pork tenderloins and make sure they are completely submerged. Refrigerate for 4 hours.
  2. Season & Fire the Grill
    1. Remove the tenderloins from the brine and pat dry with paper towels.
    2. Season all sides generously with Killer Hogs Hot Rub.
    3. Prepare a two-zone fire and stabilize the grill at 300Β°F.
  3. Cook the Tenderloins
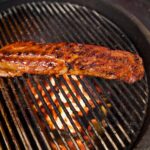
    1. Place the tenderloins on the indirect side of the grill and cook until they reach an internal temperature of 130-135Β°F, about 30 minutes.
  4. Glaze & Finish
    1. In a small bowl, combine Killer Hogs The BBQ Sauce and Gulf Coast Smoke Cherry Pineapple Glaze.
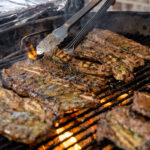
    2. Move the tenderloins directly over the hot coals. Brush with the glaze and continue cooking, turning and glazing every couple of minutes to develop color and char.
    3. Cook until the thickest part of each tenderloin reaches 145Β°F internal temperature.
  5. Rest & Serve
    1. Remove from the grill and rest for 10 minutes.
    2. Slice into medallions and serve warm.

Notes

  • The apple juice replaces the water in the brine and adds a subtle sweetness to the pork.
  • Brining helps the tenderloins retain moisture and stay juicy throughout the cook.
  • A two-zone fire allows the pork to cook evenly before finishing with a hot sear over the coals.

Malcom Reed
Connect on Facebook
Follow me on TikTok
Subscribe to my YouTube Channel
Follow me on Instagram
Buy Killer Hogs Products Here

The post BBQ Pork Tenderloins appeared first on HowToBBBQRight.
Coppa Cut Pork Chops

21 May 2026 at 13:12

Coppa Cut Pork Chops

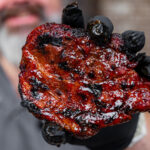
Coppa pork chops are cut from the β€œmoney muscle” end of the pork butt, giving them extra marbling and a richer, juicier bite than your average pork chop. They’re cooked over a two-zone fire, finished hot to build a little char, then coated in a sweet peach chipotle glaze that turns sticky on the outside while locking in that fire-grilled flavor.

WHAT MALCOM USED IN THIS RECIPE:

Print
coppa pork chop

Coppa Cut Pork Chops


5 Stars 4 Stars 3 Stars 2 Stars 1 Star

No reviews

Description

These Coppa Pork Chops are grilled over a two-zone fire until perfectly juicy, then finished with a sweet and smoky peach chipotle glaze. The combination of rich, marbled pork, light char from the grill, and sticky sweet heat sauce makes these chops packed with bold backyard barbecue flavor.


Ingredients

  • Coppa cut pork chops (about 1.5 inches thick)
  • Killer Hogs Hot Rub
  • 1/2 cup Heath Riles BBQ Hot Peach Glaze
  • 1–2 Tablespoons chipotle sauce (based on your heat level – you can even add more for more heat)

Instructions

  1. SEASON THE CHOPS
    – Coat each coppa chop evenly with Killer Hogs Hot Rub on all sides.
    – Let them sit at room temp and sweat while the grill comes up to temperature.
  2. FIRE UP THE GRILL
    – Set up your charcoal grill or drum smoker for a two-zone fire:
    – Indirect side running around 275Β°F Direct side for searing (you’ll bring this up later)
  3. COOK INDIRECT
    – Place the chops on the indirect side of the grill.
    – Close the lid and cook at 275Β°F until they reach about 130Β°F internal. This usually takes around 30-45 minutes, depending on your fire.
  4. MAKE THE GLAZE
    – In a small bowl, mix:
    – 1/2 cup Hot Peach Glaze
    – 1 tablespoon chipotle sauce
    – Set aside for finishing.
  5. REST THE CHOPS AND STOKE THE FIRE
    – When the chops hit around 130Β°F internal, pull them off the indirect side and set them aside to rest for a few minutes while you open up the grill and get the fire or direct side up to 500-500 degrees.
  6. SEAR AND GLAZE
    – Place the chops back over the hottest part of the grill.
    – Brush on a light coat of glaze. Flip after about a minute. Glaze again. Keep flipping and glazing every minute or so.
    – Repeat until the glaze caramelizes and sets on the outside.
    – Cook until the internal temperature reaches 140Β°F, then pull the chops off.
    – Rest for 5 to 10 minutes before serving.

Notes

This is all about controlling the internal temp so you can render the fat without drying them out, then finishing hot to build color and set the glaze.

Β 

Malcom Reed
Connect on Facebook
Follow me on TikTok
Subscribe to my YouTube Channel
Follow me on Instagram

Buy Killer Hogs Products Here

The post Coppa Cut Pork Chops appeared first on HowToBBBQRight.
Smoked Picanha

13 April 2026 at 13:11

Smoked Picanha

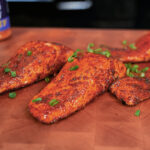
There’s a lot of ways to cook picanha, but this one is hard to beat. The reverse sear gives you control over the doneness and lets you finish with a real crust. You end up with a juicy, even cook and a crust that gives you everything you want out of a steak.

WHAT MALCOM USED IN THIS RECIPE:

Β 

Print
Reverse-Seared Picanha

Smoked Picanha


5 Stars 4 Stars 3 Stars 2 Stars 1 Star

No reviews

Description

Reverse-seared picanha cooked low for even doneness, then finished hot for a perfect crust. Simple method that delivers steakhouse-level results.


Ingredients

  • 1 whole picanha (top sirloin cap)
  • Swine Life Prime Beef Rub
  • Killer Hogs Steak Rub

Instructions

  1. SEASON
    1. Light coat of Swine Life Prime Beef.
    2. Follow with a layer of Killer Hogs Steak Rub.
    3. Let sit at room temp 30–45 minutes while the grill comes up to temp.
  2. SET UP THE GRILL
    1. Indirect cooking setup (drum cooker or any grill works).
    2. Stabilize temperature at 275Β°F.
  3. COOK (INDIRECT PHASE)
    1. Place picanha on the pit.
    2. Cook until internal temp hits 128–130Β°F
    3. Usually about 1.5 hours, but go by internal temp, not time.
  4. REST + CONTROL CARRYOVER (CRITICAL STEP)
    1. Pull around 128–130Β°F and leave the probe in.
    2. Let the internal temp rise during the rest. Once it peaks and starts coming back down, go in for the sear.
    3. Open the vents on your pit, open the lid and let the fire get hot.
  5. SEAR (HOT & FAST)
    1. Place picanha back onto pit – directly over high heat.
    2. Flip every minute.
    3. Sear for 3–5 minutes total until a crust forms.
  6. REST, SLICE, SERVE
    1. Let it rest briefly and slice against the grain.

Notes

This method is all about controlling the internal temperature so you don’t overcook the picanha during the sear.

By bringing it up slowly over indirect heat, you get even doneness all the way through. When you pull it and let it rest, the internal temp will continue to rise, then eventually peak and start to fall. That’s your window.

Once it starts coming back down, the meat has stopped actively cooking, so you can hit it with high heat to build a crust without pushing it past medium-rare.

Once you run a Picanha this way, it’s hard to go back to anything else. You get full control over the doneness and a finish that eats the way it should. It’s a simple method, but it delivers every time.

Malcom Reed
Connect on Facebook
Follow me on TikTok
Subscribe to my YouTube Channel
Follow me on Instagram

Buy Killer Hogs Products Here

The post Smoked Picanha appeared first on HowToBBBQRight.

Hot & Fast Greek Flanken Beef Ribs

23 March 2026 at 09:57

Greek Flanken Beef Ribs

Flanken beef ribs cooked hot and fast right over the fire with a Greek-style marinade and a butter baste the whole way. You get rich, beefy flavor with a real good char on the outside, and they stay juicy all the way through.

WHAT MALCOM USED IN THIS RECIPE:

Β 

Print

Greek Flanken Beef Ribs


5 Stars 4 Stars 3 Stars 2 Stars 1 Star

No reviews

Description

Flanken beef ribs cooked hot and fast right over the fire with a Greek-style marinade and a butter baste the whole way. You get a real good char on the outside with rich, beefy flavor and juicy bites all the way through.


Ingredients

Marinade Recipe

Butter Baste Recipe


Instructions

  1. Season the ribs
    – Season flanken ribs evenly on all sides with light coat of AP Seasoning and then medium coat of Gyro Hero Greek seasoning.
  2. Marinade and soak
    – Whisk together parsley, lemon juice, honey, garlic, Greek seasoning, red wine vinegar, and olive oil until combined.
    – Add ribs and toss to coat thoroughly. Cover and refrigerate for at least 3–4 hours, preferably overnight.
  3. Prepare the grill and butter baste
    – Set up a charcoal grill with a two-zone fire (hot direct side and cooler indirect side).
    – Melt butter and stir in Greek seasoning, lemon juice, and parsley. Keep warm for basting.
  4. Cook over direct heat (burn & turn)
    – Remove ribs from marinade and place directly over hot coals in batches.
    – Cook about 2 minutes per side, flipping often.
    – Baste with butter between flips and allow flare-ups to hit the meat.
    – Continue turning until the ribs develop deep caramelization with light char on the edges.
  5. Move to indirect heat
    – As each batch finishes, move ribs to the cool side of the grill, stacking loosely while remaining ribs cook.
  6. Finish and serve
    – Once all ribs are on the indirect side, close the lid and cook for about 5 minutes.
    – Remove from grill and serve immediately with a light squeeze of lemon and optional fresh parsley.

Notes

  • Burn and Turn matters – Stay with the ribs the whole time. Flip them often and don’t let them sit too long on one side or they’ll burn instead of building good char.
  • Don’t skip the marinade time – Give the ribs at least a few hours, but overnight is best. That’s what helps tenderize the meat and get that Greek flavor all the way through.
  • Butter baste is the key – Baste with butter every time you flip. It builds flavor, helps the ribs caramelize, and keeps them from drying out over the fire.
  • Expect flare-ups – Cooking directly over the coals will cause flare-ups. That’s what you want. Just keep turning the ribs so they get flame-kissed and don’t burn.

Next time you’re cooking over a hot fire, this is a good one to throw on the grill. Stay on them, keep flipping, and let the flames do their thing. That’s how you get that good char and flavor in every bite.

Malcom Reed
Connect on Facebook
Follow me on TikTok
Subscribe to my YouTube Channel
Follow me on Instagram

Buy Killer Hogs Products Here

The post Hot & Fast Greek Flanken Beef Ribs appeared first on HowToBBBQRight.
Smoked White Sauce Wings

27 August 2025 at 12:11

Smoked White Sauce Wings

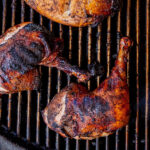
Smoked chicken wings finished with crispy char and tossed in a tangy Mississippi white BBQ sauceβ€”juicy, smoky, and packed with flavor.

WHAT MALCOM USED IN THIS RECIPE

Print
white sauce wings

White Sauce Wings


5 Stars 4 Stars 3 Stars 2 Stars 1 Star

No reviews

Description

Slow-smoked wings get seared for crispy skin, then tossed in a tang-forward Mississippi white BBQ sauceβ€”juicy, smoky, and done right.


Ingredients

  • 1 family pack whole chicken wings (about 12–14 whole wings)
  • Spicy ranch seasoning (generous coating)
  • Killer Hogs AP Seasoning (generous coating)
  • Killer Hogs Mississippi White Sauce (or your favorite white BBQ sauce)

Instructions

  1. Season the Wings
    1. Trim and separate wings if desired, or leave them whole.
    2. Season all sides generously with spicy ranch seasoning and AP seasoning. Let them sit while you fire up the grill.
  2. Set Up the Grill
    1. Prepare a 2-zone fire on your grill (one side hot, one side cool).
    2. Target grill temperature: 375–400Β°F.
    3. Pellet grill works too β€” just hold temps steady in that same range.
  3. Smoke the Wings
    1. Place seasoned wings on the cool side of the grill.
    2. Close the lid and cook about 30 minutes.
    3. Flip the wings and cook another 15–20 minutes, until they reach 180–185Β°F internal.
  4. Crisp Over the Hot Zone
    1. Working in batches, move wings directly over the hot side of the grill.
    2. Sear for 2–3 minutes per side until skin is golden and lightly charred.
    3. Use the cool side as a holding zone if wings start cooking too fast.
    4. Final target internal temp: 195Β°F β€” this ensures fat is rendered and the meat pulls clean from the bone.
  5. Sauce & Serve
    1. Remove wings from the grill and toss in Killer Hogs Mississippi White Sauce (or your favorite tangy white BBQ sauce).
    2. Serve hot and enjoy with extra sauce on the side.

Here’s the dealβ€”bone-in wings get a liberal rub of spicy ranch and AP seasoning, then they smoke low and slow on the cool side of your grill until they hit about 180–185Β°F. Next stop: the hot zone, where I give them a quick sear until the skin’s golden and laced with char. Final move? Dunk ’em in that killer Mississippi White Sauceβ€”tangy, creamy, and absolutely mouthwatering. These wingsβ€”smoky, juicy, and loaded with tangy white BBQ flavorβ€”hit different.

Malcom Reed
Connect on Facebook
Follow me on TikTok
Subscribe to my YouTube Channel
Follow me on Instagram

Buy Killer Hogs Products Here

The post Smoked White Sauce Wings appeared first on HowToBBBQRight.
Honey Balsamic Salmon on the Pellet Grill

27 August 2025 at 11:56

Honey Balsamic Salmon

Grill salmon hot to lock in moisture, then brush on a honey-balsamic glaze that caramelizes into a tangy-sweet crustβ€”restaurant flavor in just 15 minutes.

WHAT MALCOM USED IN THIS RECIPE

Print
Honey Balsamic Salmon

Honey Balsamic Salmon on the Pellet Grill


5 Stars 4 Stars 3 Stars 2 Stars 1 Star

No reviews

Description

This honey-balsamic salmon gets seared on a blazing hot grill for a perfect crust, then finished with a tangy-sweet glaze that caramelizes beautifully in just minutes.


Ingredients

  • 4 salmon fillets (6-8oz fillets)
  • Olive oil
  • King Craw Seasoning (or your favorite Cajun-style blend)

For the Honey Balsamic Glaze:

  • 2 green onions (separate the whites and the greens), thinly sliced
  • 2 cloves garlic, minced
  • 1/4 cup balsamic vinegar
  • 2 tablespoons honey
  • Salt & black pepper to taste (I used TX Brisket Rub)

Instructions

  1. Preheat your pellet grill to 400Β°F.
    You want those high temps to help build a crust and lock in the moisture.
  2. Prep the salmon:
    Lightly oil each fillet and season generously with King Craw seasoning on tops and sides. Let it sit while the grill heats up.
  3. Make the glaze:
    In a small saucepan, sautΓ© the green onion whites and garlic in a little oil until softened (1–2 minutes). Add the balsamic, honey, salt, and pepper. Let it simmer until slightly reduced and syrupy β€” about 5–7 minutes. Set aside.
  4. Grill the salmon:
    Place the fillets directly on the grates. Cook for about 13 minutes, or until the internal temp hits 125Β°F. The outside should have a nice crust at this point.
  5. Glaze it:
    Brush the salmon with the honey balsamic glaze and let it cook another 1–2 minutes until the glaze sets and your salmon reaches 135Β°F internal.
  6. Serve it up:
    Pull it off the grill and let it rest for a few minutes before serving. Pairs great with roasted veggies, rice, or even a fresh salad.

Oil up salmon fillets, season them heavy with King Crawβ€”or your favorite Cajun rubβ€”then throw them on a 400Β°F pellet or hot grill to build that craveable crust. While the salmon’s cooking, whisk together green onion, garlic, balsamic vinegar, honey, salt & pepper until it reduces into a syrupy glaze. Brush it on during the last couple of minutes so it caramelizes and locks in that sweet-tangy shine. Juicy, quick, and restaurant-worthy in just 15 minutes.

Malcom Reed
Connect on Facebook
Follow me on TikTok
Subscribe to my YouTube Channel
Follow me on Instagram

Buy Killer Hogs Products Here

The post Honey Balsamic Salmon on the Pellet Grill appeared first on HowToBBBQRight.

Open Fire Tri Tip

27 August 2025 at 11:25

Open Fire Tri Tip

I’m not trimming… I want to keep all the fat on this Tri Tip for flavor. Smother it in TX Brisket Rub (or classic salt & pepper), drop it straight over glowing coals on a Santa Maria grillβ€”press it into the grate to carve a deep sear. Flip every few minutes. Then lift it to indirect heat until the probe reads 125–130Β°F. Twenty-minute rest, slice against the grain; simplicity and smoke rule.

WHAT MALCOM USED IN THIS RECIPE

Print
open fire tri tip

Open Fire Tri Tip


5 Stars 4 Stars 3 Stars 2 Stars 1 Star

No reviews

Description

Cook tri-tip Santa Maria-style right over the coals for big flavor and a smoky crust. This open-fire tri-tip recipe keeps it simpleβ€”just bold seasoning, live fire, and a juicy medium-rare finish.


Ingredients

  • 1 whole Tri-Tip roast (untrimmed)
  • Killer Hogs TX Brisket Rub (or salt and coarse black pepper)

Instructions

  1. Don’t Trim a Thing
    Leave all the fat and sinew on that big, beautiful tri-tip. That’s how Mr. Al Frugoniβ€”the king of live fireβ€”does it, and we’re sticking to it.
  2. Season Heavy
    Hit it generously with TX Brisket Rub (or your favorite salt & pepper blend). Don’t be shyβ€”we want a big crust.
  3. Build the Fire
    Start a fire using wood splits and lump charcoal. Once you’ve got a solid coal bed, rake the coals under your cooking grate and let it heat up.
  4. Sear Over High Heat
    Place the tri-tip directly over the hot coals and press it into the grate for good contact. Flip every 3–4 minutes to build a deep sear and bark on both sides.
  5. Finish Over Medium Heat
    Once seared, move it a bit higher above the coals or to indirect heat. Keep flipping every few minutes until the internal temp hits 125–130Β°F for medium-rare.
  6. Rest and Slice
    Let it rest for 20 minutes. Then slice it against the grainβ€”split it down the middle crook first, since the grain runs different ways.

Β 

This tri-tip is all about cooking beef the old-school wayβ€”over a live fire. Season it heavy with salt and pepper, then drop it straight over hot coals on a Santa Maria grill to build that smoky crust. Flip it often, ease it up off the heat, and cook to a juicy medium-rare. Rest it, slice it thin against the grain, and you’ve got bold flavor, tender beef, and a recipe built for the backyard fire pit or grill.

Malcom Reed
Connect on Facebook
Follow me on TikTok
Subscribe to my YouTube Channel
Follow me on Instagram

Buy Killer Hogs Products Here

The post Open Fire Tri Tip appeared first on HowToBBBQRight.
Jerk Chicken

23 April 2025 at 17:24

Jerk Chicken Recipe

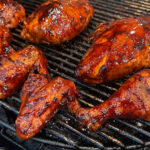
To me, jerk chicken is something special. It’s smoky, spicy, sweet and packed with flavor. And it makes your whole backyard smell amazing when your cooking it!

Now, I’m no Jamaican pitmaster, but I did my best to stay true to the authentic Jerk Chicken I’ve had in the Caribbean. I started with a killer marinade, added just the right amount of char and even made a fiery dipping sauce to serve with it.

WHAT MALCOM USED IN THIS RECIPE

Print
jerk chicken

Jerk Chicken


5 Stars 4 Stars 3 Stars 2 Stars 1 Star

No reviews

Description

This spicy jerk chicken recipe is smoky, juicy, and packed with bold Caribbean flavors! Whether you’re grilling or smoking, I’ll show you how to make the BEST jerk chicken with the perfect balance of heat and sweetness.


Ingredients

For the Chicken & Marinade:

  • 1 whole chicken, cut into quarters
  • 1 bottle Walkerswood Jerk Marinade
  • 1 tablespoon Malcom’s Jammin’ Jerk Seasoning
  • 1 cup dark brown sugar
  • 1 Scotch Bonnet or Habanero pepper, thinly sliced
  • 1 bunch green onions, chopped (green parts for marinade, white parts for sauce)
  • 4–5 cloves garlic, minced
  • Juice from 1/2 lemon
  • 4 oz pineapple juice
  • 1 tablespoon Scotch Bonnet pepper sauce
  • 1 tablespoon Worcestershire sauce

For the Jerk Dipping Sauce:

  • 1/2 stick butter
  • White parts of the green onion, finely chopped
  • 4 cloves garlic, minced
  • 1 Scotch Bonnet or Habanero pepper, finely chopped
  • 1 tablespoon Scotch Bonnet pepper sauce
  • 4–5 dashes Worcestershire sauce
  • 1 teaspoon Malcom’s Jammin’ Jerk Seasoning
  • 1/4 cup brown sugar
  • 1/4 cup honey
  • Juice from 1/2 lemon

Instructions

  1. Marinate the Chicken:
  • Cut the whole chicken into quarters, separating white and dark meat. Score the chicken breasts with shallow slits to help with even cooking and better flavor absorption.
  • Place the chicken quarters in a large ziplock bag. Pour in the jerk marinade and add Malcom’s Jammin’ Jerk seasoning.
  • In a separate bowl, whisk together the remaining marinade ingredients, then pour into the ziplock bag.
  • Squeeze out excess air, seal the bag, and gently massage the marinade into the chicken. Refrigerate overnight (or at least 8 hours).

2. Prepare the Grill:

  • Remove the chicken from the marinade and lightly season with a little more Jerk seasoning.
  • Set up a charcoal grill for two-zone cooking at 350Β°F. (I used my Primo ceramic grill, but any grill works.)

3. Cook the Chicken:

  • Place the chicken on the indirect side of the grill. Cook for about 45 minutes, or until the internal temperature reaches 160Β°F for white meat and 175Β°F for dark meat.

4. Make the Jerk Dipping Sauce:

  • Place a heavy-bottomed pot directly over the hot coals.
  • Add butter, white parts of the green onion, garlic, and peppers. SautΓ© for 2-3 minutes until softened.
  • Stir in the remaining sauce ingredients and bring to a gentle boil. Remove from heat and pour into a small dish to cool.

5. Char & Serve:

  • Move the chicken quarters to the direct heat side of the grill.
  • Sear for 1-2 minutes per side, just until you get that perfect jerk char.
  • Remove from the grill and let rest for 5 minutes before serving.
  • Serve hot with the jerk dipping sauce on the side.

Enjoy the bold, smoky, and spicy goodness of this Jerk Chicken!

Malcom Reed
Connect on Facebook
Follow me on TikTok
Subscribe to my YouTube Channel
Follow me on Instagram

Buy Killer Hogs Products Here

The post Jerk Chicken appeared first on HowToBBBQRight.
Charcoal Grilled Ribs

10 July 2024 at 13:03

Charcoal Grilled Ribs

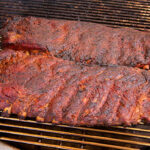
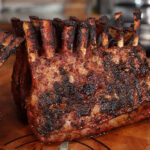
If you love your ribs to have a grill flavor – this is the recipe for you! They cook fast, they stay juicy and the flavor is better than the best grilled pork chop you’ve ever had. Plus you can get creative with this one – use whatever rubs you like, use whatever mop you like and just get to burning and turning some ribs!

Β 

WHAT MALCOM USED IN THIS RECIPE:

Β 

Print

Charcoal Grilled Ribs


5 Stars 4 Stars 3 Stars 2 Stars 1 Star

No reviews

Description

This method cooks some FIRE ribs really fast. We use the charcoal and the grill to impart some serious flavor – and we baste the ribs the entire cook so they come out juicy, tender and oh so delicious!


Ingredients

  • 2 slabs St. Louis Cut Spare Ribs
  • 1/4 cup Killer Hogs Hot Rub
  • 28oz apple cider vinegar
  • 1/4 cup fine sea salt (feel free to add less salt to suite your taste)
  • 1/4 cup ground cayenne pepper
  • juice from one lemon

Instructions

  1. Trim the excess fat and remove the membrane from each slab of ribs.
  2. Season the ribs on both sides with a light coat of Killer Hogs Hot Rub.
  3. Prepare a charcoal grill for 2 zone cooking at 300Β°F.
  4. Place the ribs over the direct heat side of the grill – the cool zone is just in case you need to get them away from the fire. These ribs cook over the direct heat side the entire cook.
  5. Combine the vinegar, salt, cayenne pepper, and lemon juice in a quart mason jar. Shake it well.
  6. Flip the ribs every ten minutes keeping the grilll temperature steady at 300Β°F.
  7. Once the outside begins to dry out start mopping with the basting liquid using a bbq mop.
  8. Β Continue to flip and mop until the internal temperature reaches 198-200Β°F.
  9. Move the ribs over to the indirect heat side for 5-10 minutes.
  10. Cut the ribs into individual bone pieces and serve with additional mopping sauce for dabbing.

Malcom Reed
Connect on Facebook
Follow me on TikTok
Subscribe to my YouTube Channel
Follow me on Instagram

Buy Killer Hogs Products Here

The post Charcoal Grilled Ribs appeared first on HowToBBBQRight.
Beef Flanken Ribs

10 July 2024 at 11:48

Beef Flanken Ribs

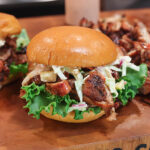
Flanken Ribs have a rich, beef flavor – and when you take the time to marinade them and then chargrill them directly over hot coals, you get a delicious bite of beefy goodness!

For this recipe I went with an Asian inspired marinade… but you could go with any flavors. You could glaze them with a sauce at the end… get real creative with this recipe.

Β 

WHAT MALCOM USED IN THIS RECIPE:

Print
Beef Flaken Ribs

Beef Flanken Ribs


5 Stars 4 Stars 3 Stars 2 Stars 1 Star

No reviews

Description

Grilled Beef Flaken Ribs – Flaken Ribs have a rich, beef flavor – and when you take the time to marinade them and then chargrill them directly over hot coals, you get a delicious bite of beefy goodness!


Ingredients

  • 4lbs flanken-cut beef ribs
  • 1 bunch green onions – chopped divide the green and white parts
  • 2 heaping teaspoons minced garlic
  • 2 teaspoons minced ginger
  • 1/4 cup soy sauce
  • 1/4 cup worcestershire sauce
  • 1/8 cup balsamic vinegar
  • 2 Tablespoons Hoisin sauce
  • 1 Tablespoon Killer Hogs TX Rub

Instructions

  1. Place the white parts of the onion in a mixing bowl and add: minced garlic, ginger, soy, worcestershire, balsamic vinegar, hoisin, and TX. Stir to combine.
  2. Add the beef flanken cut ribs to a large ziplock bag and pour in the marinade. Squeeze the air out of the bag and gently toss the ribs around so everything is coated in the marinade. Place the bag in the refrigerator for at least an hour.
  3. Prepare a grill for 2 zone cooking – hot side and cool side. Grill the ribs over the direct heat zone (hot side) of the grill. Work in batches so the grill isn’t over crowded. Cook the ribs on each side until they begin to char about 3-4 minutes each side. Then move them over to the cool zone until all of the ribs are char-grilled.
  4. Place the ribs on a foil lined baking sheet, wrap the foil around the top to seal off the heat, and rest the ribs for 20-30 minutes.
  5. To serve place the ribs on a large cutting board or platter and top with the green tops of the onions.

Malcom Reed
Connect on Facebook
Follow me on TikTok
Subscribe to my YouTube Channel
Follow me on Instagram

Buy Killer Hogs Products Here

The post Beef Flanken Ribs appeared first on HowToBBBQRight.

Old School BBQ Chicken

24 May 2024 at 07:31

Old School BBQ Chicken

BBQ Chicken cooked over charcoal on a Primo Grill and glazed with a Barbecue Sauce to make some grilled, juicy, saucy Old School BBQ Chicken.

WHAT MALCOM USED IN THIS RECIPE:

Print
Old School BBQ Chicken

Old School BBQ Chicken


5 Stars 4 Stars 3 Stars 2 Stars 1 Star

No reviews

Description

Grilled & Sauced BBQ Chicken – I start with a whole, cut-up chicken Β (2 wings, 2 thighs, 2 legs and 2 breasts) and then brined it in a BBQ Brine for 2 hours, then seasoned with BBQ Rub and grilled. At the end, each piece of chicken is glazed with a slightly spicy bbq sauce and allow to caramelize and char a little. The final product is juicy, tangy, sweet and saucy Old School BBQ Chicken.


Ingredients

  • 8pc chicken skin on, bone in
  • 2 cups water
  • 1 bottle Wickers BBQ Marinade
  • 1 lemon sliced
  • 1/4 cup Malcom’s Bird Brine
  • 1/2 cup Killer Hogs Hot Rub (divide into 2 portions)
  • 1 cup Killer Hogs The BBQ Sauce
  • 1 cup Killer Hogs Vinegar Sauce
  • 2oz Killer Hogs Hot Sauce

Instructions

  1. Place the chicken pieces in a large zip top bag and pour in the Wickers marinade.Β  Add 1/4 cup Bird Brine and 1/4 cup of Hot Rub to the water and stir well.Β  Pour this mixture over the chicken and squeeze the lemon slices then drop in the bag.Β  Make sure all pieces of chicken are covered and close the bag squeezing as much air out as possible. Place bag in the refrigerator for 4-6 hours at least.
  2. Remove the chicken pieces from the brine and place on a raised wire rack to air dry for 30 minutes.Β  Season with Hot Rub on all sides.
  3. Prepare a charcoal grill for indirect cooking using a 2 zone method – Hot side and Cool side.Β  Adjust the air vents so the grill temperature reaches 350 degrees.
  4. Place the chicken on the cool side of the grill skin side up until the internal temperature reaches 150-155 degrees.
  5. Combine the bbq sauce, vinegar sauce, and hot sauce in a small container.Β  Brush the skin side with the sauce and cook for 10 minutes. Flip each piece over and brush sauce over the back side and cook for 10 minutes.
  6. Right at the very end move each piece of chicken over to the direct heat side of the grill and glaze on both sides.Β  Don’t walk away because it can burn really quick.Β  The breast should reach an internal temperature of 165 and the dark meat should go to at least 175.

Malcom Reed
Connect on Facebook
Follow me on TikTok
Subscribe to my YouTube Channel
Follow me on Instagram

Buy Killer Hogs Products Here

The post Old School BBQ Chicken appeared first on HowToBBBQRight.

Rack of Lamb with a Pepper Jelly Glaze

18 April 2024 at 18:23

Grilled Rack of Lamb

Reverse Seared Rack of Lamb is the perfect way to nail the Medium Rare inside and get a nice, Chargrilled Crust on the outside. And forget about the traditional Mint Jelly served with Lamb because this Rack of Lamb has a Pepper Jelly Glaze.

WHAT MALCOM USED IN THIS RECIPE:

Print
Pepper Jelly Glazed Rack of Lamb

Rack of Lamb with a Pepper Jelly Glaze


5 Stars 4 Stars 3 Stars 2 Stars 1 Star

No reviews

Description

Reverse Seared Rack of Lamb is the perfect way to nail the Medium Rare inside and get a nice, Chargrilled Crust on the outside. And forget about the traditional Mint Jelly served with Lamb because this Rack of Lamb has a Pepper Jelly Glaze.


Ingredients

FOR THE MARINADE:

PEPPER JELLY GLAZE

  • 1 jar habanero pepper jelly
  • 1 Tablespoon balsamic vinegar
  • 2 Tablespoons hot water
  • 1/2 teaspoon salt
  • 1/2 teaspoon black pepper
  • Pinch of red pepper flakes

Instructions

  1. Season the racks of lamb with a light coat of Gyro Hero Greek Seasoning.
  2. Place the racks in a large ziplock bag or container and pour the marinade over the top. Close the bag and make sure all of the meat is covers with the marinade. Refrigerate for 1 hour minimum.
  3. Remove the lamb from the marinade and re-season with a little more Gyro Hero Greek Seasoning.
  4. Prepare the Primo smoker for indirect cooking at 250 degrees.
  5. Place the racks of lamb on the pit, insert a meat probe thermometer to monitor internal temperature and cook the lamb until the internal temp reaches 115 degrees.
  6. Remove the lamb from the pit and rest for 30 min. While the lamb rest remove the heat diverter plate from heat grill for direct searing at 550 degrees.
  7. Combine the pepper jelly glaze ingredients below in a small bowl. Reserve a little for serving with the lamb.
  8. Place the lamb over the hot coals and brush with the pepper jelly glaze. Sear for about 1 minute on all sides.
  9. Repeat for all 3 racks then slice into individual chops and serve with a drizzle of the reserved pepper jelly glaze.


The post Rack of Lamb with a Pepper Jelly Glaze appeared first on HowToBBBQRight.

Jerk Chicken Sandwich

5 April 2024 at 11:25

Jerk Chicken Sandwich

With this recipe, you can turn cheap, boneless, skinless chicken thighs into a big ol’ delicious $20 Jerk Chicken Sandwich. Or get some slider buns and make a Jerk Chicken Sandwich bar…

Β 

This one is so good because you start with some chicken thighs – they go directly into a jerk marinade. Then get a charcoal grill fire up with some Royal Oak (setup with a two-zone fire). After the chicken soaks for at least 1 hour, it can go directly onto to grill – over the hot coals.

Β 

This is when I season the chicken thighs with Jerk Seasoning – right over the fire – because it smells so good! Once the chicken cooks a little, it’s time to glaze it with a Jerk Sauce until chargrilled and caramelized.

Β 

To make the Jerk Chicken Sandwich, slice the chargrilled Jerk Chicken and put on a toasted brioche bun with Island Slaw and a Calypso Sauce.

WHAT MALCOM USED IN THIS RECIPE:

Print
Jerk Chicken Sandwich

Jerk Chicken Sandwich


5 Stars 4 Stars 3 Stars 2 Stars 1 Star

No reviews

Description

Chargrilled SPICY Jerk Chicken Sandwich


Ingredients

  • 3–4lbs boneless skinless thighs

Jerk Marinade

  • 3 green onions chopped
  • 2 scotch bonnet peppers (more if you like it hot!)
  • 2 Tablespoons dark brown sugar
  • 1/4 cup lime juice
  • 1/4 cup soy sauce
  • 1/4 cup olive oil
  • 1 Tablespoon salt
  • 1/2 Tablespoon black pepper
  • 1 heaping Tablespoon Malcom’s Jammin’ Jerk Seasoning

Jerk Glaze

  • 1/2 cup Ketchup
  • 3 Tablespoons dark brown sugar
  • 2 Tablespoons honey
  • 2 Tablespoons fresh squeezed lime juice
  • 2 Tablespoons red wine vinegar
  • 1 Tablespoon soy sauce
  • 1 Tablespoon Malcom’s Jammin’ Jerk Seasoning
  • 1 tsp salt
  • 1 teaspoon black pepper
  • 2 dashes cayenne pepper
  • 2 dashes white pepper

For the Jerk Chicken Sandwiches

  • 1 pack of hamburger buns (lightly toasted)
  • Green leaf lettuce
  • Dill pickle slices
  • Island Slaw (recipe below)
  • Calypso Sauce (recipe below)

Island Slaw

  • 4 Tablespoons Blue Plate Mayo
  • 2 Tablespoons dijon mustard
  • 1/4 cup red wine vinegar
  • 1 teaspoon salt
  • 1 teaspoon cracked black pepper
  • 1 bag of cole slaw mix
  • 2 green onions chopped
  • 1/4 cup diced red onion
  • 1 Tablespoon finely diced scotch bonnet pepper
  • 1 cup fresh pineapple chopped

Calypso Sauce

  • 1/2 cup Blue Plate Mayo
  • 1/4 cup ketchup
  • 2 TBS scotch bonnet pepper hot sauce
  • dash of white pepper
  • season to taste with salt & black pepper

Instructions

  1. Place the boneless skinless chicken thighs in a large ziplock bag. Combine the marinade ingredients and pour over the chicken. Close the bag and gently toss to coat each thigh. Place the bag in the refrigerator for at least 1 hour.
  2. Prepare a 2 zone charcoal grill – hot side and indirect side.
  3. Add the marinated chicken to the hot side of the grill working in batches. Season with additional jerk seasoning right on the grill.
  4. Flip and turn the chicken often until internal temp reaches 165.
  5. Brush each piece with the jerk glaze – recipe above.
  6. Continue to cook until the thighs reach 175 internal – it should be slightly charred and sticky from the glaze.
  7. After a short rest slice the thighs into small strips.

Island Slaw Directions

  1. In a small bowl combine the mayo, Dijon, red wine vinegar, salt and pepper. Mix until smooth.
  2. Place the bag of Cole slaw mix in a large mixing bowl. Add the green onion, diced red onion, scotch bonnet pepper, and pineapple.
  3. Toss it together using tongs and add the dressing mixture.
  4. Mix the slaw with tongs and cover with plastic wrap. Store in the refrigerator until ready to serve.

To build the sandwiches: Spread the calypso sauce on the top and bottom bun Layer on the dill pickle slices and lettuce. Pile on the jerk chicken and island slaw then the top half of the bun.

Malcom Reed
Connect on Facebook
Follow me on TikTok
Subscribe to my YouTube Channel
Follow me on Instagram

Buy Killer Hogs Products Here

The post Jerk Chicken Sandwich appeared first on HowToBBBQRight.

BBQ Chicken Pizza

10 September 2022 at 11:01
bbq chicken pizza

BBQ Chicken Pizza

Chicken thighs grilled and charred over charcoal grill. Then sliced and used for a quick and easy Pellet Grill BBQ-style Chicken Pizza using White BBQ Sauce, JalapeΓ±os and lots of cheese! This recipe is a perfect Football Food! WHAT MALCOM USED IN THIS RECIPE: Print
bbq chicken pizza

BBQ Chicken Pizza


Description

Grilled chicken thighs used to make a simple – quick and easy – BBQ Chicken Pizza… using White BBQ Sauce, JalapeΓ±os and lots of cheese! This recipe is a perfect Football Food!


Ingredients


Instructions

  1. Prepare a charcoal grill for 2 zone grilling. Hot coals on one side and a cool zone on the other.
  2. Season boneless, skinless chicken thighs with Killer Hogs Hot Rub.
  3. Place the chicken thighs on direct side of the grill. Flip sides for even cooking every 3-5 minutes. Continue cooking chicken thighs until internal temp hits 165 minimum. You can always move chicken to cool side to allow to finish cooking if needed.
  4. Rest the chicken thighs for 5 minutes and slice into thin strips.
  5. Preheat pellet grill – or any other grill – set up for indirect cooking at 425 degrees F. You can also cook pizza in the oven.
  6. Open pizza crust and spread it on a greased baking sheet.
  7. Spread Killer Hogs White Sauce over crust. Sprinkle half the mozzarella over sauce.
  8. Top with grilled chicken thigh strips. Add sliced jalapeΓ±os and diced onion followed by triple blend cheddar and remaining mozzarella.
  9. Place pizza on grill and cook until cheese has melted and edges are golden brown – about 25-30 minutes but keep an eye on it.
  10. Remove pizza from grill and drizzle too with Killer Hogs The BBQ Sauce before cutting to serve.

Keywords: bbq chicken pizza, grilled pizza, pizza, football food, bbq pizza, grilled chicken

Malcom Reed Connect on Facebook Follow me on TikTok Subscribe to my YouTube Channel Follow me on Instagram

Have a Question About This Recipe?

Connect with us in our HowToBBQRight Facebook group for recipe help, to share your pictures, giveaways, and more!

The post BBQ Chicken Pizza appeared first on HowToBBBQRight.

Dirty Bird Chicken Bites

2 September 2022 at 10:42
Dirty Bird Chicken Bites

Dirty Bird Chicken Bites

Bacon-Wrapped Chicken stuffed with a Hot Dill Pickle – Charcoal Grilled – and Served with a Sweet and Spicy β€œDirty Dip” Sauce WHAT MALCOM USED IN THIS RECIPE: Print
dirty bird chicken bites

Dirty Bird Chicken Bites


Description

Chunks of chicken breas – cut into big, bite-sized pieces – wrapped with bacon and a spicy pickle. Seasoned with Hot Sauce and Hot BBQ Rub, then grilled over charcoal until the chicken is done (but still juicy) and the bacon is crispy. Then served with a β€œDirty Dip” dipping sauce for a sweet and spicy kick.


Ingredients


Instructions

  1. Place bite sized chunks of chicken breast in a bowl and add hot sauce to coat. Make sure all pieces are coated. Refrigerate for at least 1 hour up to overnight.
  2. Remove chicken bites from marinade and place on half strip of bacon. Add 1 Hot Dill pickle slice and secure bacon around the bite with a toothpick.
  3. Season the chicken bites with Killer Hots Hot Rub
  4. Prepare charcoal grill for 2 zone grilling – hot and cool side.
  5. Place the bacon wrapped bites on the cool side of the grill away from direct heat. Let them cook for 35-45 minutes moving as necessary to prevent burning. Internal temperature should reach 165 internal.
  6. Serve these spicy bacon wrapped chicken bites with the β€œDirty Dip” Dipping Sauce.

β€œDirty Dip” Dipping Sauce

  • 1/4 cup Soy Sauce
  • 1/4 cup Honey
  • 3 heaping Tablespoons Brown Sugar
  • 2 Tablespoons Sriracha Sauce
  • 1 Tablespoon Pineapple Juice

Place the above ingredients in a pyrex mixing bowl and stir to combine. Heat in the microwave at 100% power for 2-3 minutes or until the sugar dissolves. Stir and allow too cool before serving. Mixture will thicken as it stands.

Keywords: chicken bites, grilled chicken, grilled chicken bites, spicy chicken, football food, dirty bird bites, dirty bird chicken bites

Malcom Reed Connect on Facebook Follow me on TikTok Subscribe to my YouTube Channel Follow me on Instagram

Have a Question About This Recipe?

Connect with us in our HowToBBQRight Facebook group for recipe help, to share your pictures, giveaways, and more!

The post Dirty Bird Chicken Bites appeared first on HowToBBBQRight.

Lemon Pepper Chicken Quarters

28 April 2022 at 15:07
Lemon Pepper Chicken Quarters

Lemon Pepper Chicken Quarters

Chicken Leg Quarters Recipe with Lemon Pepper Flavors – and then grilled on the Weber Kettle and served with White BBQ Sauce. WHAT MALCOM USED IN THIS RECIPE: Print
Lemon Pepper Chicken Quarters

Lemon Pepper Chicken Quarters


Description

Chicken Leg Quarters seasoned with Lemon Pepper Stepper seasoning and grilled over charcoal on the Weber Kettle


Ingredients

  • 8 Chicken Leg Quarters
  • 1/4 cup olive oil
  • 3 Tablespoons Killer Hogs AP Seasoning
  • 3 Tablespoons Lemon Pepper Seasoning (Tone’s Brand)
  • 1 teaspoon dried parsley
  • 1 teaspoon dried rosemary
  • 1 teaspoon dried thyme
  • 1 stick butter melted
  • 1–2 lemons halved
  • 1 bottle Killer Hogs Mississippi White Sauce

Instructions

  1. Prepare weber kettle grill for grilling using a charcoal vortex for indirect grilling using briquette charcoal.
  2. Combine AP seasoning, lemon pepper, and dried herbs in small bowl and transfer to a dredge shaker.
  3. Pat dry and trim leg quarters, lightly coat both sides with olive oil, and season generously with the seasoning mixture.
  4. Arrange the leg quarters around the outer edge of the Weber grill for indirect cooking.
  5. Half the lemons and place on the grate for 4-5 minutes cut side down. Squeeze the grilled lemon juice into the melted butter and season with 1 Tablespoon of the seasoning mixture.
  6. Baste the leg quarters with the lemon butter mixture 20 minutes into the cook.
  7. Continue grilling the leg quarters until the internal temperature reaches a minimum of 175Β°F ( I prefer to take them to 190Β°F for more tender meat and crispy skin).
  8. Remove the leg quarters from the grill and drizzle with Killer Hogs MS White Sauce

Keywords: Lemon Pepper Chicken Quarters, Lemon Pepper Chicken Leg Quarters, Lemon Pepper Chicken Recipe, grilled lemon pepper chicken, grilled lemon pepper quarters, Chicken on the weber kettle

Malcom Reed
Connect on Facebook
Follow me on TikTok
Subscribe to my YouTube Channel
Follow me on Instagram

Have a Question About This Recipe?

Connect with us in our HowToBBQRight Facebook group for recipe help, to share your pictures, giveaways, and more!

The post Lemon Pepper Chicken Quarters appeared first on HowToBBBQRight.

❌
❌