Normal view

There are new articles available, click to refresh the page.
Before yesterdayCooking: BBQ

Baconpalooza: 9 Ways to Grill With Bacon

“…bacon is in its terminal stage, clinging to relevance, grasping at any opportunity to cash in on its dwindling cachet as its 15 minutes come to an end.”

So wrote Seattle journalist Erica C. Barnett in May 2009, in the alternative newspaper The Stranger.

Well, Ms. Barnett, you got it wrong. Time to eat crow, preferably wrapped in a bacon weave.

Yes, cured and smoked pork belly is still one of America’s favorite flavors, an exceedingly popular meat at supermarkets and butcher shops from coast to coast. At breakfast it sits beside eggs, toast, pancakes, or potatoes. On a hamburger it contributes smoke and crunch. Wrapped around vegetables, chicken, fruit, or scallops, its rendering fat bastes whatever lies beneath it. Crumbled over salads or soups, a small amount can flavor an entire dish. Even bacon fat itself becomes an ingredient, carrying its smoky character into eggs, beans, cornbread, vegetables, gravies, stews, and sauces.

“Fry” it on your outdoor grill or griddle and avoid messy spatters and lingering odors.

Here are our favorite ways to enjoy this versatile meat.

Make a Bacon Weave

Have you yet to try the impressive bacon weave, a savory cloak that elevates meatloaf, pork loin, and the Thanksgiving turkey?

Bacon sausage fattie

If not, find concise directions and tips for success here. It’s easy and is guaranteed to impress friends and family.

Make Bacon Jam

We read that 69 percent of U.S. restaurants feature bacon on their menus, some in the form of bacon jam.

It’s a bougie condiment you can make yourself. Find the recipe for Bacon Jam here.

BBQ Sauce

Make Bacon Bourbon

Bacon isn’t limited to the plate. You can even put it in your glass.

Our Bacon Bourbon uses rendered bacon fat to infuse bourbon with smoke. Sip it straight or use it for Manhattans and Old Fashioneds. Better still, garnish the cocktail with a strip of bacon.

Bacon Bourbon

Bacon-Wrapped Onion Rings

Wrap thick slices of sweet onions with thin-cut bacon for a porky twist on onion rings.

Bacon on a Stick

Thread bacon on bamboo skewers and grill at 375 degrees for 8 to 10 minutes per side, or until done to your liking.

Serve with burgers or other grilled sandwiches. These also make good stir sticks for Bloody Marys.

Bacon-Wrapped Corn

Spiral bacon slices around ears of sweet corn.

Bacon-Wrapped Fruit

Wrap wedges of fruit—peaches, cantaloupe, or pears—with bacon and grill to your liking.

Make Onion Bombs

Follow our directions for Onion Bombs—a blessed marriage between onions, bacon, and ground meat.

Onion Bombs

Make Your Own Bacon

Make your own bacon! It’s easier than you think and can be on your table in as little as two days.

Homemade Bacon

Photo: Steve Nestor

Our 48-hour homemade bacon method shows you how.

Looking for your next cook? Browse the Recipe Index for grilling and smoking inspiration.

Get Steven’s weekly grilling tips, seasonal recipes, and live-fire ideas in your inbox. Join our Up in Smoke newsletter. Sign up and get a FREE PDF of Steven Raichlen's Best Ribs Recipes Ebook.

Preorder Man On Fire — A Steven Raichlen Memoir. And get some really cool rewards!

Looking for some fall grilling inspiration? Check out our Fall Grilling Guide.

The post Baconpalooza: 9 Ways to Grill With Bacon appeared first on Barbecuebible.com.

Now Everyone Can Celebrate National Quesadilla Day!

9 September 2026 at 07:37

Monument Grills Makes Accommodating Food-Sensitive Foodies Easy

By John White

When it comes to a daily household menu, most families have a diversity of needs, wants and plain-old “I don’t like that” sensitivities. For example, I don’t like baked potatoes, but I’ll go out of my way for French fries.

Sometimes, personal likes and dislikes don’t factor into the equation, but actual sensitivities do. In my family’s case, it’s gluten, as my wife and daughter can’t tolerate it. But that doesn’t mean we don’t eat well (we do!), nor does it mean we can’t celebrate National Quesadilla Day, even though flour tortillas would be considered a necessary ingredient.

Delicious Food-Sensitive Quesadillas Without Sacrificing Flavor

Once again, my graciously provided Monument Mesa II propane-fired grill made preparing this multi-step, Mexican-inspired treat easy, using the grill, a griddle and side-mounted burner for an accompaniment of refried beans.

Monument Messa II

And…what would a Mexican feast be without salsa (in this case, Pico de Gallo), Guacamole and Margaritas!

Cocktail Chips Salsa

The Menu

Gluten and gluten-free chipotle chile-marinated quesadillas with refried beans, guacamole, pico de gallo and margaritas, traditional or made with non-alcoholic spirits.

The Recipes

Recipe

Chipotle Chile Marinade

From Steven’s book, Barbecue Sauces, Rubs and Marinade.

Yield:
Makes 2 cups adobo, enough to marinate 2 to 3 pounds of meat or seafood

Ingredients

  • 1/2 teaspoon cumin seeds
  • 1/2 teaspoon black peppercorns
  • 3 ripe plum tomatoes
  • 3 cloves garlic, peeled
  • 1/2 medium-size onion, peeled and cut in half
  • 1/3 cup fresh lime juice
  • 3 tablespoons fresh orange juice
  • 2 tablespoons red wine vinegar
  • 2 to 4 canned chipotle chiles
  • 1 to 2 teaspoons canned chipotle juices
  • 1 teaspoon dried oregano
  • 1 teaspoon coarse salt (sea or kosher)

Instructions

  1. Heat a comal or dry skillet over medium heat. Add the cumin and peppercorns and toast until fragrant, 2 minutes. Transfer the spices to a blender or spice mill and grind to a fine powder. Leave the spices in the blender.
  2. Place the tomatoes, garlic, and onion on the comal and cook until nicely browned on all sides, turning with tongs. This will take 4 to 6 minutes for the garlic, and 10 to 12 minutes for the tomatoes and onion. Coarsely chop the vegetables and transfer them to the blender with the spices.
  3. Add the lime and orange juices, the vinegar, chipotle chiles and juices, oregano, and salt. Run the blender in bursts to reduce the ingredients to a thick purée. Transfer to a large jar, cover, and refrigerate. Use within a few hours of making.

Chicken Sauce

Recipe

Chipotle Chile-Marinated Chicken Quesadillas

Ingredients

  • Marinated and cooked chicken breast, using the Chipotle Chile Marinade above
  • 1 cup shredded Monterey Jack cheese
  • 1 (or more, depending on the number of guests) 8- to 10-inch flour tortilla(s)
  • 2 (or more, depending on the number of guests) 6-inch cassava or almond flour tortillas

Instructions

  1. Heat a griddle on the grill top of the Monument Mesa II to medium-hot (about 350 degrees).
  2. Shred the chicken breasts and, in a bowl, toss with the Monterey Jack cheese.
  3. For the flour tortilla, sprinkle the chicken-cheese mixture on half of the tortilla, then fold it over to create a half-moon.
  4. For the cassava or almond flour tortillas, sprinkle the chicken-cheese mixture over one tortilla and cover with another tortilla, like a sandwich.
  5. Prepare the griddle with a tablespoon or two of olive oil and heat until hot, but not smoking.
  6. Place the quesadillas on the griddle under a weight and cook until the cheese begins to melt and the quesadillas begin to crisp. Flip and cook until the cheese is fully melted, then remove from the griddle.
  7. Let the quesadillas cool slightly, cut into wedges and serve with sour cream, salsa, guacamole and refried beans.

Chipotle Chile-Marinated Quesadillas

Recipe

Refried Beans

Ingredients

  • One small bag (1/2 pound) pinto beans
  • 1/2 large white onion
  • 1 tablespoon kosher or sea salt
  • 2 canned chipotle chiles
  • 3 tablespoons olive oil
  • 1/2 cup (approx. 4 oz.) Monterey Jack cheese

Instructions

  1. Place pinto beans in a large pot and cover with 8 cups of water. Add the onion and set over high heat. Once it comes to a boil, reduce the heat to medium, partly cover with a lid and cook for 1 hour.
  2. Remove the lid, stir in salt, partly cover with the lid, and cook for another 15 to 30 minutes, until the beans are tender and the liquid is tinted from the pinto beans.
  3. Uncover the pot of beans and, using a slotted spoon, remove and discard the onion.
  4. Working in batches, add the cooked beans along with 1 cup of their cooking liquid and the chipotle chiles to a food processor, and pulse until the mixture forms a coarse purée.
  5. Heat the oil in a large, heavy, cast-iron sauté pan on the side burner of the Monument Mesa II to medium. Once hot, but not smoking, carefully add the bean purée. Stir well, incorporating the hot oil into the bean mixture. Cook for 3 to 5 minutes, stirring often until the mixture thickens a bit.
  6. Stir in the grated Monterey Jack and continue to cook for another minute or so, stirring frequently until the mixture forms a thick purée.

Refried Beans

Finally, what would a delicious quesadilla be without a tasty Margarita?

John’s (Almost Famous) Margarita

Recipe

John’s (Almost Famous) Margarita

Ingredients

  • 1 fresh lime
  • 2 “generous” shots (4 oz.) of high-quality tequila (Casamigos or Mijenta)
  • 1 shot (1 oz.) Cointreau
  • 1 “squirt” organic light agave syrup
  • 1 handful or a bit more of crushed ice
  • Kosher or sea salt

Instructions

  1. Fill 1/2 of a large cocktail shaker with crushed ice.
  2. Slice the lime in half and, using a reamer, squeeze over the ice. Include some rind.
  3. Add tequila, Cointreau and agave.
  4. Cut one thin slice of the remaining half-lime for garnish and “wet” the rim of a margarita glass with the rest of the lime, then salt the rim of the glass.
  5. Shake the tequila mixture vigorously and pour into the glass.
  6. Garnish the cocktail with the lime slice and enjoy!

Recipe

John’s (Nearly Famous) Margarita with Non-Alcoholic Spirits

Ingredients

  • 1 fresh lime
  • 3 “generous” shots (6 oz.) of Aplós non-alcoholic spirits (either Calme or Arise)
  • 1 “squirt” organic light agave syrup
  • 10 “shakes” of Angostura Orange Bitters
  • 1 handful or a bit more of crushed ice
  • Kosher or sea salt

Instructions

  1. Fill 1/2 of a large cocktail shaker with crushed ice.
  2. Slice the lime in half and, using a reamer, squeeze over the ice. Include some rind.
  3. Add Aplós, agave and orange bitters.
  4. Cut one thin slice of the remaining half-lime for garnish and “wet” the rim of a margarita glass with the rest of the lime. Salt the rim of the glass.
  5. Shake the Aplós mixture vigorously and pour into the glass.
  6. Garnish the cocktail and enjoy!

John’s (Almost Famous) Margarita

Remember…

It doesn’t have to be a holiday to enjoy quesadillas. Cook a few extra, let them cool, seal in sandwich bags and reheat for a treat anytime. Happy National Quesadilla Day from the entire team at BarbecueBible!

Looking for more recipes like this? Browse our Recipe Index for grilled, smoked, and live-fire favorites.

Get Steven’s weekly grilling tips, seasonal recipes, and live-fire ideas in your inbox. Join our Up in Smoke newsletter. Sign up and get a FREE PDF of Steven Raichlen's Best Ribs Recipes Ebook.

Preorder Man On Fire — A Steven Raichlen Memoir. And get some really cool rewards!

Looking for some fall grilling inspiration? Check out our Fall Grilling Guide.

The post Now Everyone Can Celebrate <br />National Quesadilla Day! appeared first on Barbecuebible.com.

Hot or Hotter: Pepper Steak Two Ways

Photo by: Steve Nestor


September 9 is National Steak au Poivre Day. Here at BarbecueBible.com, we’re celebrating with one of the great French steak preparations: beef crusted with cracked black pepper and served with a Cognac cream sauce.

Traditionally, steak au poivre is made with filet mignon in a skillet on the stovetop. We’re taking it outside, using ribeye and a cast-iron skillet over a wood fire.

The idea for this version came from BarbecueBible Test-Kitchen Director Steve Nestor, who cooked a ribeye steak au poivre in cast iron over a wood fire in 2023. His original version inspired the approach here.

Why Ribeye for Steak au Poivre?

Ribeye brings considerably more marbling and beef flavor to the equation.

It also stands up well to the assertive flavors in this dish. There’s a lot going on between the cracked peppercorns, Dijon mustard, Cognac, and cream. Ribeye doesn’t disappear underneath the sauce.

Cast Iron Meets Wood Fire

Set up the grill for a two-zone wood fire, with a hot side and a cooler side. A chimney starter makes quick work of getting the fire going. The hot side will heat the skillet and cook the steak; the cooler side gives you a place to finish the sauce, especially once the Cognac comes out.

Lightly brush the ribeye with Dijon mustard, then coat it with freshly cracked black peppercorns. The mustard helps the pepper stick to the steak. And cracked is the operative word here. You want some texture from the peppercorns, not a coating of finely ground pepper.

Heat a 10-inch cast-iron skillet over the hot side of the fire. Add the butter, then the pepper-crusted ribeye.

Cooking the steak in cast iron rather than directly on the grill grate keeps the butter, rendered beef fat, and browned bits in the pan.

Ribeye Steak

Photo by: Steve Nestor


Transfer the ribeye to a wire rack set over a sheet pan and let it rest while you make the sauce. Don’t wipe out the skillet. The butter, beef drippings, and browned bits left behind are the starting point for the au poivre sauce.

Building the Au Poivre Sauce

With the steak resting, sauté the diced shallot directly in the skillet, then add the mushrooms you grilled earlier over the wood fire.

Move the skillet to the cooler side of the grill before adding the Cognac. Pour it into the skillet, then ignite it with a long match or butane lighter, keeping your face and hands back from the pan. Let the flames burn out on their own, then stir in the Dijon mustard and heavy cream. Cook until the sauce reduces and thickens.

Recipe

Wood-Fired Ribeye Steak au Poivre

A thick-cut ribeye is brushed with Dijon mustard, crusted with cracked black pepper, and cooked in cast iron over a wood fire. The steak drippings become the base for a Cognac cream sauce with shallots and grilled mushrooms.

Ingredients

  • 1 thick-cut ribeye steak, 16 to 20 ounces
  • 1 tablespoon Dijon mustard, for brushing the steak
  • 2 tablespoons coarsely cracked black peppercorns, plus more for the sauce
  • 2 tablespoons butter
  • 8 ounces mushrooms, sliced
  • 1 shallot, diced
  • Kosher salt
  • 3 tablespoons Cognac
  • 1 teaspoon Dijon mustard, for the sauce
  • 1 cup heavy cream

Instructions

  1. Set up the grill for a two-zone wood fire, with a hot side and a cooler side.
  2. Grill the sliced mushrooms over the wood fire until browned. Set aside.
  3. Lightly brush the ribeye with 1 tablespoon Dijon mustard, then coat it with the cracked black peppercorns.
  4. Place a 10-inch cast-iron skillet over the hot side of the fire. When the skillet is hot, add the butter. Once the butter melts, add the ribeye and cook for about 4 minutes. Flip the steak and cook for another 4 minutes, or until cooked to your desired doneness.
  5. Transfer the steak to a wire rack set over a sheet pan and let it rest while you make the sauce. Do not wipe out the skillet.
  6. Sauté the diced shallot in the remaining butter and steak juices. Add the grilled mushrooms and season with kosher salt and additional cracked black pepper.
  7. Move the skillet to the cooler side of the grill and add the Cognac. Ignite it with a long match or butane lighter, keeping your face and hands back from the pan. Let the flames burn out on their own.
  8. Stir in 1 teaspoon Dijon mustard and the heavy cream. Bring the sauce to a boil, then cook until it reduces and thickens.
  9. Slice the rested ribeye and spoon the au poivre sauce over the top. Serve immediately.

Au poivre isn’t limited to ribeye. The same peppercorn-and-Cognac treatment works with strip steak, sirloin, or the traditional filet mignon. You can also take the sauce beyond beef and serve it with pork chops, lamb, or venison.

The Finished Felet Mignon

Photo by: Steve Nestor


Not Hot Enough? Pepper Steak Barbecue University Style

This steak gets its smoky char flavor from a singular grilling method—cavemanning, aka grilling directly on the embers. I like to start with a nice thick T-bone for this recipe—1-1/2 inches thick. Season it super generously with coarse sea salt and cracked black pepper.

Build a charcoal fire and rake out the embers to an even layer. Fan the coals with a folded newspaper to dislodge any ash.

Then lay the T-bone directly on the coals. Grill until the bottom is charred and beads of blood start to pearl on the top, 3 minutes or so. Move the steak once or twice with tongs, so it grills evenly. Then, using long-handled tongs, invert it and grill the other side the same way. Transfer the steak to a wire rack over a sheet pan, shaking it to dislodge any embers.

And now the pepper sauce. Heat 1/4 cup extra virgin olive oil in a long-handled skillet directly on the embers. Add 4 thinly sliced jalapenos, 4 thinly sliced garlic cloves, and 1 cup chopped fresh cilantro. Cook the ingredients in the oil, stirring with tongs, until the jalapenos and garlic are sizzling and lightly browned. Pour the mixture over the steak and dig in.

Whichever version you choose, I’m sure you’ll agree that pepper(s) make a great steak taste even better!

Do you have a favorite steak au poivre? Share your photos on Steven’s social media: @stevenraichlen.

Want to go deeper on the craft? Explore our grilling techniques and how-to guides for ribs, steak, chicken, seafood, and more.

Get Steven’s weekly grilling tips, seasonal recipes, and live-fire ideas in your inbox. Join our Up in Smoke newsletter. Sign up and get a FREE PDF of Steven Raichlen's Best Ribs Recipes Ebook.

Preorder Man On Fire — A Steven Raichlen Memoir. And get some really cool rewards!

Looking for some fall grilling inspiration? Check out our Fall Grilling Guide.

The post Hot or Hotter: Pepper Steak Two Ways appeared first on Barbecuebible.com.

Perfect Baby Back Ribs

28 August 2026 at 13:14

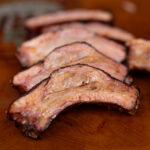
Perfect Baby Back Ribs

I’ve cooked baby back ribs just about every way you can cook them. Different smokers, different seasonings, different sauces… and there’s really no one right way to do it. You can take just about any good rib recipe and make some great ribs.

What makes the biggest difference is knowing what to look for along the way.

It starts with picking out a good rack and trimming it up so it cooks evenly. Then you gotta know when the bark is set and the ribs are ready to wrap, what tender ribs should actually feel like, and when it’s time to get them off the pit. And one of the biggest things I’ve learned is to give ribs a good hold once they’re tender. That little bit of time lets everything settle down before you put on the final glaze.

For these ribs, I’m using Tyson Baby Back Ribs from Walmart and keeping the flavors pretty simple. But that’s really the point. Change the seasoning, change the sauce, cook them on whatever smoker you’ve got. If you pay attention to these little things during the cook, you’ll get tender, juicy ribs with that beautiful mahogany finish every time.

WHAT MALCOM USED IN THIS RECIPE:

Print
baby back ribs

Perfect Baby Back Ribs


5 Stars 4 Stars 3 Stars 2 Stars 1 Star

No reviews

Description

These baby back ribs are smoked at 275°F until the bark is set, wrapped until tender, then given a proper hold before finishing with a final glaze. It’s the little things along the way that give you tender, juicy ribs with a beautiful mahogany finish.


Ingredients


Instructions

  • PREP THE RIBS
    • Remove the membrane from the back of each rack. Square up the ends and trim away any loose fat or anything that doesn’t look like it will cook up appetizing. Squaring up the rack makes the finished ribs look better, and those thin ends tend to dry out during the cook anyway.
  • SEASON THE RIBS 
    • Apply a medium-heavy coat of Killer Hogs The BBQ Rub to both sides of the ribs. No binder is needed.
  • SMOKE AT 275°F
    • Any smoker will work. Cook the ribs for about 2–2½ hours, but don’t go strictly by time. You’re looking for the rub to fuse into the meat and form a good-looking bark. That’s when they’re ready to wrap.
  • MAKE THE WRAP MIXTURE
    • Combine the melted butter, apple juice, ¼ cup Killer Hogs The BBQ sauce and 1–2 Tablespoons of Killer Hogs The BBQ Rub.
  • WRAP THE RIBS
    • Place each rack meat-side down on a sheet of foil. Pour half of the wrap mixture over each rack. Fold the foil over the ribs and tuck in the ends to seal.
  • COOK UNTIL TENDER
    • Return the wrapped ribs to the smoker. After about 1½ hours, start checking for tenderness. The ribs should feel very flexible through the foil, you should see some disintegration around the bones, and the internal temperature should be around 204–208°F.
  • VENT AND HOLD
    • Open the foil and allow the steam to escape, then wrap the ribs back up and place them in a dry cooler for 1 hour.
    • Burp the cooler about every 15 minutes to release excess heat and steam. This gives the meat a chance to calm down and reabsorb some of the liquid from the wrap.
  • GLAZE & SET
    • Remove the ribs from the foil. Brush the bottom and top with a layer of Killer Hogs The BBQ Sauce and finish with a light dusting of Killer Hogs The BBQ Rub.
    • Return the ribs to the smoker for 15–20 minutes, just long enough for the sauce to caramelize and set.

Notes

  • Picking a good rack: When I’m buying Tyson Baby Back Ribs, I look for racks that are as even as possible, with straight bones and a tight vacuum seal. Starting with a good, uniform slab helps the ribs cook more evenly.
  • Don’t cook by the clock alone: The times are a guide. Look at the bark before wrapping and use the feel of the ribs, the bones and internal temperature to determine when they’re tender.
  • Make the wrap your own: Butter, apple juice and BBQ sauce is the combination used here, but the wrap can be changed to suit the flavor you want. Think about adding some combination of fat, sweet, vinegar and heat. Whatever you use, adding a little more of your original seasoning to the wrap helps reinforce the flavor you started with.
  • Don’t skip the hold: Giving the ribs an hour in a dry cooler after they’re tender lets them settle down and reabsorb some of that flavorful liquid before the final glaze.

Malcom Reed
Connect on Facebook
Follow me on TikTok
Subscribe to my YouTube Channel
Follow me on Instagram

Buy Killer Hogs Products Here

The post Perfect Baby Back Ribs appeared first on HowToBBBQRight.

24+ BBQ Sandwich Recipes for Your Next Cookout

By: Charlie
26 August 2026 at 20:40

A good BBQ sandwich never needs an occasion — but it works for everyone. I make them constantly, especially when there is leftover pulled pork, smoked brisket, or BBQ chicken in the fridge that deserves better than just being reheated on a plate. Smoky meat, a good bun, and the right sauce are one of […]

The post 24+ BBQ Sandwich Recipes for Your Next Cookout appeared first on Simply Meat Smoking.

BBQ Dinner Ideas

By: Charlie
26 August 2026 at 20:30

If the same rotation of burgers and sausages is starting to feel a little tired, this roundup is worth a look. I put this together because I found myself cooking the same handful of BBQ dinner ideas every time the grill went on — and there is genuinely so much more you can do with […]

The post BBQ Dinner Ideas appeared first on Simply Meat Smoking.

Fire-Roasted Hatch Chile Burgers: A Taste of New Mexico

25 August 2026 at 06:00
Photo Credit: Daniel Hale


By Daniel Hale

There are burgers, and then there are burgers that make you rethink what a burger should be.

I came across these New Mexican Green Chile Burgers while paging through Steven Raichlen’s Raichlen’s Burgers.

This is the kind of burger I had never really considered. Sure, I’ve had plenty of chili cheeseburgers. But a green chile burger? That was something new for me.

So when Melissa’s Produce sent me a box of fresh mild Hatch chiles in the middle of Hatch season, I knew exactly what I wanted to make.

I fired up the Monument Grills Eminence 605 and put Steven’s New Mexican burger to the test.

What Makes a Hatch Chile Different?

Hatch isn’t a particular variety of pepper. The name refers to chiles grown in and around New Mexico’s Hatch Valley.

They can range from mild to seriously hot, but what makes them special is their distinctive flavor—especially once they meet fire. Roasting softens the flesh, concentrates the flavor, and adds a smoky edge that makes green chile a natural partner for grilled beef.

Hatch Peppers

Photo Credit: Daniel Hale


Once roasted, the chiles are covered briefly to steam, then peeled, seeded, and cut into strips. Some go into the cheddar topping for the burgers, while the rest can be used to make Steven’s New Mexican Salsa Verde.

Making the Green Chile Burgers on the Monument Eminence 605

The first job for the Monument Grills Eminence 605 was roasting the Hatch chiles.

I fired up the grill and brought the temperature to around 550° to 600°F. That intense heat quickly blistered and blackened the skins while softening the flesh underneath.

Fire-roasted green chiles blistered on the grill

Photo Credit: Daniel Hale


The Eminence 605’s six main burners made it easy to generate the high heat I was looking for. I placed the chiles directly over the heat and turned them until the skins were blistered on all sides.

While they cooked, I kept an eye on the grill through the Monument Grills app. The Eminence 605 connects to the app via Bluetooth, allowing me to monitor the grill temperature from my phone without constantly lifting the lid.

Monument Grills App

Photo Credit: Daniel Hale


Once the chiles were roasted, peeled, and seeded, they became the ingredient that really sets Steven’s New Mexican Green Chile Burger apart.

The chile shows up twice. First, strips of fire-roasted Hatch chile are combined with grated white cheddar and piled onto the hot burger, where the cheese melts around the peppers.

Then comes the salsa verde. Made with roasted green chiles, garlic, cilantro, lime juice, cumin, and oregano, it adds another layer of chile flavor along with acidity and freshness.

The burgers themselves are intentionally simple: ground chuck or sirloin seasoned generously with salt and pepper. After roasting the chiles, I used the Eminence 605 to grill the beef patties and toast the hamburger buns.

Burgers on the Monument Eminence 605 Grill

Photo Credit: Daniel Hale


Steven’s original recipe calls for New Mexican green chiles, Anaheim chiles, or poblanos. If you can get fresh Hatch chiles while they’re in season, use them.

Recipe

New Mexican Green Chile Burgers with Salsa Verde

Recipe by Steven Raichlen

These New Mexican green chile burgers get a double dose of chile flavor from fire-roasted peppers mixed with white cheddar and a fresh New Mexican salsa verde.

Method
Direct grilling
Serves
4

Ingredients

Instructions

  1. Place the chile strips in a serving bowl and stir in the Cheddar. Cover and refrigerate until ready to use.
  2. Wet your hands with cold water and divide the ground beef into 4 equal portions. Working quickly and with a light touch, pat each portion into a thick patty. Place the patties on a plate lined with plastic wrap and refrigerate, covered, until ready to grill.
  3. Generously, and I mean generously, season each patty on both sides with salt and black pepper. Grill the burgers until they are cooked through. Remove the burgers and cover to keep warm. Leave the grill on.
  4. Brush the cut sides of the hamburger buns with the olive oil. Place the buns on the hot grill, cut side down, and, lowering the temperature if necessary, grill until toasted, 1 to 2 minutes. You may need to work in batches.
  5. Place each of the burgers on the bottom half of a bun and top each with a quarter of the chile and cheese mixture. Spoon some salsa verde over each, top with the other half of the bun, and serve at once.

Fire Up a Different Kind of Burger

I have to say, this burger was fantastic.

You get great beefy flavor up front, followed by the roasted chile and just enough Hatch chile heat at the finish. The salsa verde adds brightness without overpowering the burger.

A great burger doesn’t always need bacon, a dozen toppings, or some complicated secret sauce. Sometimes all it takes is good beef, a hot grill, melted cheese, and one ingredient that changes the whole personality of the burger.

In New Mexico, that ingredient is green chile.

After trying one topped with fire-roasted Hatch chiles, the standard lettuce-and-tomato cheeseburger suddenly has some serious competition.

Fire-Roasted Hatch Chile Burgers

Photo Credit: Daniel Hale


A huge thanks to Monument Grills for sponsoring this post.

The post Fire-Roasted Hatch Chile Burgers:<br /> A Taste of New Mexico appeared first on Barbecuebible.com.

19 Easy Pit Boss Pork Recipes to Try

By: Charlie
18 August 2026 at 21:01

Pork is probably the protein I put on the Pit Boss more than anything else. There is something about the way it takes on smoke — whether it is a shoulder going low and slow for pulled pork, baby back ribs that have been on for hours, or a quick set of pork chops for […]

The post 19 Easy Pit Boss Pork Recipes to Try appeared first on Simply Meat Smoking.

21+ BBQ Chicken Recipes

By: Charlie
18 August 2026 at 20:54

There is something about the smell of chicken on the grill that just signals summer. I make BBQ chicken more than almost anything else during the warmer months — it is fast, the whole family eats it, and the cleanup is minimal. Think sticky BBQ chicken thighs, juicy grilled chicken breast, smoky drumsticks, and loaded […]

The post 21+ BBQ Chicken Recipes appeared first on Simply Meat Smoking.

7 Make-Ahead Meals for When School Schedules Get Crazy7 Make-Ahead Meals for When School Schedules

18 August 2026 at 11:07
7 Make-Ahead Meals for When School Schedules Get Crazy When classes, exams, work shifts, clubs, and social plans start filling the calendar, cooking a full meal every day can feel impossible. The easiest solution is not complicated recipes or hours in the kitchen. Make-ahead meals can help you prepare nutritious food in advance so there […]

8 Easy Recipes for College Students

17 August 2026 at 12:33
College life can make cooking feel like one more task on an already busy schedule. Between classes, studying, work, and social activities, there is not always time for complicated meals. The good news is that you do not need advanced cooking skills or an expensive grocery list to eat well. These easy recipes for college […]

32+ BBQ Party Food Ideas – Mains, Sides & Apps For A Crowd

By: Charlie
12 August 2026 at 22:11

There’s something about firing up the smoker with a full backyard of people that never gets old — it’s one of my favorite excuses to cook all day. Whether you’re throwing a birthday bash, a long weekend cookout, or just using any excuse to get the smoker going, a good spread makes the whole thing. […]

The post 32+ BBQ Party Food Ideas – Mains, Sides & Apps For A Crowd appeared first on Simply Meat Smoking.

Octoberfest in August? A Bratwurst Feast Worth Celebrating!

12 August 2026 at 06:00

A Twist on Indirect Grilling this German Staple Courtesy on Monument Grills

By John White

Suffering through one of the hottest summers on record, it’s tempting to project what it will be like in a few weeks. Cool and crisp with perfect weather for celebrating a bountiful harvest with grilled Bratwurst and, of course, cold beer!

That must be exactly what residents of Johnsonville, Wisconsin thought when they established National Bratwurst Day in the early 20th Century – this year, celebrated on August 16th.

In Sheboygan, Wisconsin – the “Bratwurst Capital of the World,” – residents grill them over charcoal and eat them on a special hard-crusted, soft-crumbed roll called a semmel, with brown German mustard, dill pickles, and an optional flourish of diced onions.

Being an enthusiast of all things Teutonic – that sounds delicious to me! But…can that wonderful, smoky flavor and slightly crisped texture be replicated on a gas-fired grill?

In their graciousness, our friends at Monument Grills have provided an opportunity for me to discover the versatility of their Mesa II unit, and I’d found that with its side-mounted burner and the Smoker Bar accessory, this grill can accommodate a variety of tasks – from boiling water, to frying bacon and, of course, grilling – making it a ‘one-stop’ workspace for nearly any culinary adventure.

Should you be motivated to celebrate National Bratwurst Day this week, the following provides and easy and efficient way to enjoy a German feast that is truly ‘wonderbar!’

The Menu

Grilled Bratwurst with German Potato Salad, Sauteed Onions, Homemade Sauerkraut and Homemade Mustard

For inspiration, I referred to Steven’s Bratwurst recipe, recommending an indirect method for grilling the ‘brats. Like a traditional frankfurter or hot dog, Bratwurst is easy to cook – and, in this case I used the Mesa II ‘Broil Zone’ feature with the Smoker Box (filled with water-soaked Applewood chips) positioned between the flames and, with the lid closed, I heated the grill grates to 325.

Once up to temperature, I placed the Bratwurst (shout-out to Barth’s, in New Providence, New Jersey for the Beer and Thuringer Bratwurst) over the cool side of the grill. Turn the Bratwurst to cook it evenly and, when they reach an internal temperature of 150º to 160º, expose them to flame to blister the casing a bit.

Brats on the Messa II

It couldn’t be easier – and they grilled perfectly.

While the Brats are on the grill, use the side burner to sauté finely chopped white onion in oil or butter and serve over the Brats on your roll.

Monument Grills - Mess II Side Burner

As an accompaniment, I used my wife’s German Potato Salad recipe for which I was able to use one saucepan on the Mesa II’s side burner for boiling water and frying bacon (Note: It’s important to fry the bacon in the same saucepan that’s used for completing the salad).

Recipe

Martine’s German Potato Salad

This warm German-style potato salad combines tender potatoes with crisp bacon, red onion, celery, garlic, and parsley. A tangy dressing made with apple cider vinegar, Dijon mustard, and maple sugar brings everything together while the potatoes are still warm.

Ingredients

  • 1 pound yellow gold or red potatoes, small to medium size
  • 1/2 teaspoon salt, for the boiling water
  • 6 ounces bacon, cut into 1/2-inch pieces
  • 1/4 cup apple cider vinegar
  • 1 tablespoon Dijon mustard
  • 1 to 2 tablespoons granulated maple sugar or sugar
  • 2 cloves garlic, minced
  • 1/4 cup chopped celery
  • 1/4 cup chopped red onion
  • 1/4 cup chopped parsley
  • 1/2 teaspoon salt, for seasoning the potato salad
  • Freshly ground black pepper

Instructions

  1. Scrub the potatoes and cut any larger potatoes so all the potatoes are uniform in size. Place the potatoes in a medium pot and cover with cold water. Bring to a boil and add 1/2 teaspoon salt. Reduce the heat and simmer the potatoes for about 20 minutes, or until tender when pierced with a fork. Drain and transfer the potatoes to a cutting board. Let cool, then slice the potatoes into about 1/2-inch pieces.
  2. Using the same pot, heat over moderate heat and add the bacon. Cook, stirring occasionally, until crispy. Remove the bacon from the pot and reserve about 2 tablespoons of the bacon fat.
  3. With the pot off the burner, add the vinegar, sugar, Dijon mustard, salt, and pepper to the bacon fat. Return the pot to the heat, bring to a simmer, and whisk for a few minutes. Using a wooden spoon, stir in the chopped onion, celery, and minced garlic. Cook for a few minutes, until the garlic turns light golden.
  4. Remove the pot from the burner and add the sliced potatoes, gently mixing from the bottom until the potatoes absorb the liquid. Fold in the cooked bacon and chopped parsley.
  5. Transfer the potato salad to a serving dish and serve warm.

For an alternate side-dish, see our recently posted recipe for German Potato Salad.

To make this meal as authentic as possible, I also made a truly delicious Horseradish Mustard, from Steven’s book, Barbecue, Sauces, Rubs and Marinades.

Barbecue, Sauces, Rubs and Marinades

Recipe

Horseradish Mustard

Recipe by Steven Raichlen

This homemade mustard gets its bite from a blend of yellow and brown mustard seeds and fresh horseradish. White wine, vinegar, brown sugar, and black pepper round out the flavor for a sharp, full-bodied condiment.

Ingredients

  • 1/4 cup yellow mustard seeds
  • 1/4 cup brown mustard seeds, or more yellow mustard seeds
  • 1/2 cup white wine vinegar
  • 1/2 cup dry white wine
  • 3 tablespoons hot water
  • 2 teaspoons light brown sugar
  • 1 teaspoon coarse salt (sea or kosher), or to taste
  • 1 teaspoon freshly ground black pepper, or to taste
  • 2 ounces (about 2 inches) fresh horseradish root, peeled and cut into 1/2-inch pieces, or 4 tablespoons prepared white horseradish

Instructions

  1. Combine the yellow and brown mustard seeds, vinegar, wine, and hot water in a nonreactive saucepan and bring to a boil over high heat. Remove the pan from the heat and cool to room temperature. Soak the mustard seeds at room temperature until soft, 1 hour.
  2. Transfer the mustard seed mixture to a blender or food processor and process to a coarse purée. Transfer the purée to the top of a nonreactive double boiler over simmering water, or to a nonreactive saucepan sitting in a sauté pan of simmering water. Add the brown sugar, salt, and pepper and cook, stirring often, until thick and creamy, 15 to 20 minutes. Don’t worry if the mixture isn’t quite as thick as commercial mustard; it will thicken as it cools. Remove the pan from the heat and let the mustard cool to room temperature. Correct the seasoning, adding salt and pepper to taste.
  3. Place the horseradish in a food processor fitted with a chopping blade and finely chop. Take care not to inhale the volatile fumes. Add the mustard and process to mix. Transfer the mustard to a large jar, cover, and refrigerate. The mustard will keep for several weeks.

Variation

Sun-Dried Tomato Mustard

Prepare as for Horseradish Mustard, substituting 4 sun-dried tomatoes for the horseradish. Soak the tomatoes in hot water until soft, 1 hour. Chop and add them to the mustard mixture when you purée it in Step 2.

…and don’t forget…

Finally, what would a German meal of grilled Bratwurst be without a healthy serving of hand-crafted Sauerkraut and a cold German beer of your choosing.

how to grill bratwurst

Of course, it’s also important to grill plenty of Brats for friends and family to enjoy – Happy National Bratwurst Day!

You can also find Steven over on his YouTube channel, sharing recipes, techniques, and stories from the grill.

And for weekly updates, sign up for the Up in Smoke Newsletter.

The post Octoberfest in August? A Bratwurst Feast Worth Celebrating! appeared first on Barbecuebible.com.

27+ New Year’s Smoker Recipes

By: Charlie
10 August 2026 at 21:15

New Year’s Eve is one of my favorite excuses to fire up the smoker and go all out. There’s something about ending the year with a smoked rack of lamb or prime rib that just feels right. I’ve put together a full menu here — showstopper mains, appetizers like smoked queso and pork belly burnt […]

The post 27+ New Year’s Smoker Recipes appeared first on Simply Meat Smoking.

Back to Basics: How to Grill Shrimp and Lobster

6 August 2026 at 07:47

By Steven Raichlen

It’s America’s favorite seafood. Despite its diminutive name and size, we consume more than 5 pounds per person—for every man, woman, and child—per year.

I’m talking, of course, about shrimp.

Shrimp is quick and easy to grill, delivering a satisfying taste in a matter of minutes. It’s pure protein and in this world of $50-a-pound strip steaks, it’s mercifully affordable. It absorbs virtually any spice, marinade, and smoke flavor you throw at it, without losing its own unique briny flavor. Not everyone eats oysters, clams, or sea urchins. Everyone loves shrimp.

Wildfire Banner

Withal, not all shrimp is created equal, nor do all varieties cook the same on the grill. Here’s what you need to know to grill the perfect shrimp every time. And while we’re at it, we’ll give you some pointers on grilling shrimp’s big brother: lobster.

What You Need to Know About Shrimp

What’s the Difference Between Shrimp and Prawns?

A simple question with a complicated answer. In the U.S. we tend to call these crustaceans “shrimp.” In the UK, people call the same shellfish “prawns.” (In Italy, prawns are called “scampi.”) There are also anatomical, zoomorphic, and biological differences too complicated to get into. Don’t let that interfere with the pleasure of grilling them.

Grilled Fireworks Shrimp

What Size Shrimp Is Best for Grilling?

Shrimp range in size from Quebec’s diminutive crevettes Nordiques (so tiny you can fit a dozen in a tablespoon) to Africa’s black tiger prawn, which can grow up to a foot in length. Shrimp in the U.S. are sold by the “U” size—for example, U-16 means fewer than 16 headless shrimp to a pound. That’s what I use when making shrimp kebabs. When grilling individual shrimp, I buy U-8s or U-10s—also sold as “colossal.”

East-West Shrimp Cocktail

Should You Grill Shrimp With the Heads On?

In much of the world, people grill shrimp with the heads on. There’s lots of flavor in the head (don’t be embarrassed to suck it out), and it looks cool as all get out. Never underestimate the power of looking cool at the grill.

Should You Grill Shrimp With the Shells On?

I like grilling shrimp in the shell. Fire-charred shells add flavor and keep the meat moist. I like grilling peeled shrimp because they’re quicker and easier to eat (and easier to marinate). There’s a place for both in my barbecue world.

Should You Leave the Tails On?

A lot of restaurants leave the tails on—to remind you that the creature you’re about to eat once swam in the ocean. Or maybe to give you a handle when eating shrimp with your fingers. The fire-charred tail adds a bit of flavor. But it also adds another step come time to eat the shrimp, so omit it if you prefer.

How to Devein Shrimp

A visible black vein in a cooked shrimp is off-tasting and unsightly. Here are three ways to remove it.

  1. Use a shrimp peeler and deveiner. Insert the deveiner in the fat end of the shrimp and push. The shell and vein will come off easily.
  2. Butterfly the shrimp—that is, make a V-shaped cut along the back of the shrimp to cut out the vein and the flesh immediately surrounding it. The advantage of this method: The shrimp curls into an attractive butterfly shape as it cooks.
  3. Insert the tine of a fork in the rounded part of the back under the vein and gently lift. Most of the time, the vein will pull right out.

How to Grill Shrimp

In a nutshell, directly over high heat. Grill small shrimp kebab-style (threaded on bamboo or metal skewers). The skewer should pass through the head end and tail end so each shrimp lies flat on the grate. It’s a lot easier to turn 4 kebabs than 20 individual shrimp.

Catalan Grilled Shrimp Kebabs

For the really big guys, like African black tiger prawns, cut them almost in half through the back (cut lengthwise), butterfly them open, and grill as you would a lobster tail. And don’t overlook smoking: Smoked shrimp make an awesome shrimp cocktail.

Figure on 1/2 pound of headless shrimp per person.

Which Shrimp Should You Grill?

Shrimp remain mercifully regional, and each variety has its own distinct texture and taste. If you live on the southeastern seaboard, you eat delicate Carolina shrimp. If you come from Down East, sweet white Maine shrimp are your ticket. Down my way, in south Florida, we grill succulent Key West pinks. Californians and Hawaiians savor spot prawns—so named for the black eye-like mark on the side of the shell. Wild-caught shrimp are my personal favorite—buy them whenever you can.

Otherwise, you’ll use farmed shrimp, which are mercifully affordable and available everywhere. If you’re worried about the provenance, look for the Marine Stewardship Council label on wild-caught shrimp. For farmed shrimp, look for certification from the Aquaculture Stewardship Council or Best Aquaculture Practices.

When buying shrimp, use the sniff test. They should smell briny and fresh, like the seashore, not a fish store. Avoid shrimp that smell ammoniated or like bleach.

A Word About Grilling Lobster

Here in North America, we have two basic varieties to choose from. Down my way, in Miami, we get spiny lobster, also known as Florida lobster (or langosta among our many Spanish speakers). Its lack of claws and wide meaty tail makes it ideal for grilling. Up in Martha’s Vineyard, where I spend my summers, we have Homarus americanus, Maine lobster, distinguished by its large front claws. Spiny is easier to split and grill (and it’s my wife’s favorite), so that’s the recipe featured here.

Grilled Lobster

Here are five of our favorite shrimp and lobster recipes, starting with a New Orleans classic: Emeril Lagasse’s Barbecued Shrimp.

Shrimp and Lobster Recipes to Try

Emeril Lagasse’s New Orleans-Style Barbecued Shrimp

Emeril Lagasse’s New Orleans classic starts with jumbo shrimp seasoned with Cajun spices. The shrimp are grilled over high heat and basted with a rich barbecue sauce made with onion, garlic, lemon, Worcestershire sauce, white wine, and cream.

Emeril Lagasse's New Orleans-Style Barbecued Shrimp

Get The Recipe »

Shrimp Spiedini with Salmoriglio

These colorful Sicilian-inspired kebabs alternate shrimp with sweet onion, bell peppers, padrón or shishito peppers, sage, and bay leaves. As they grill, the spiedini are basted with salmoriglio—a lively Italian sauce made with fresh herbs, capers, olives, lemon, and olive oil.

Shrimp Spiedini with Salmoriglio

Get The Recipe »

Greek Grilled Shrimp

This simple recipe proves that shrimp don’t need much embellishment. Greek-inspired herbs, extra-virgin olive oil, and fresh lemon give the shrimp plenty of flavor before they’re quickly grilled over medium-high heat.

Greek Grilled Shrimp

Get The Recipe »

Smoked Shrimp Cocktail with Chipotle Orange Sauce

This is shrimp cocktail reimagined for the smoker. Garlic, cilantro, chipotle, and lime season the shrimp, while the accompanying cocktail sauce combines citrus, Worcestershire sauce, and more chipotle for a smoky, spicy finish.

Smoked Shrimp Cocktail with Chipotle Orange Sauce

Get The Recipe »

Grilled Florida Lobster, Rum Butter Basted and Mango Salsa

Florida lobster gets the Miami treatment in this live-fire recipe. The split lobsters are grilled over high heat and repeatedly basted with dark rum butter flavored with scallions, smoked paprika, lime, and cilantro, then served with a fiery mango salsa.

Grilled Florida Lobster with Rum Butter and Mango Salsa

Get The Recipe »

Wildfire Outdoor Living is an Arizona-based company specializing in high-performance gas grills and premium outdoor kitchen solutions. Wildfire brings a commitment to cutting-edge technology and industry-leading innovation. Their 304 stainless steel design and illuminated LED knobs, cast stainless steel burners, and laser-cut stainless steel cooking grates create products that will provide peak performance. They also allow you to customize your outdoor kitchen with designer finish knobs and handles to meet the growing demand for designer outdoor kitchens.

Plan your next cook with our full recipe collection—weeknight grills, weekend projects, and special-occasion feasts.

Get Steven’s weekly grilling tips, seasonal recipes, and live-fire ideas in your inbox. Join our Up in Smoke newsletter. Sign up and get a FREE PDF of Steven Raichlen's Best Ribs Recipes Ebook.

Preorder Man On Fire — A Steven Raichlen Memoir. And get some really cool rewards!

Looking for some fall grilling inspiration? Check out our Fall Grilling Guide.

The post Back to Basics: How to Grill Shrimp and Lobster appeared first on Barbecuebible.com.

25 Easy Pit Boss Chicken Recipes

By: Charlie
3 August 2026 at 22:44

I’ve cooked a lot of chicken on the Pit Boss over the years, and it never disappoints. There’s something about pellet-smoked chicken — whether it’s a whole bird, a tray of wings, or a simple batch of thighs — that just hits different to anything coming out of the oven. This round-up covers every cut […]

The post 25 Easy Pit Boss Chicken Recipes appeared first on Simply Meat Smoking.

How to Make the Best Potato Salad You’ve Ever Tasted—The Secret Is the Smoke

It wins no competitions. It joins no halls of fame. But without it, a grill session would be short of an essential element. And barbecue—whether the backyard variety or the kind served at your favorite smokehouse—would seem downright incomplete.
I speak, of course, of potato salad. If you make it from scratch, good for you. I’m going to tell you how to make it better. And if you’ve never made potato salad from scratch, it’s time to start.

Some of the world’s great grill cultures back me up on this. What would German Spiessbraten—onion-stuffed pork shoulder spit-roasted over blazing birchwood—be without Kartoffelsalat, the warm, vinegary, bacony potato salad served alongside it? Or Peruvian anticuchos—grilled beef-heart kebabs—without papas a la huancaína, potatoes dressed with a piquant Andean chile-cheese sauce?

Closer to home, there’s the potato salad at your neighborhood barbecue joint, or even at temples of smoke and fire like Franklin Barbecue in Austin and Lewis Barbecue in Charleston. The style may change, but the message does not: don’t stage a grill session without it.

What Makes a Great Potato Salad?

First, there’s the potato. Then the dressing. Then the embellishments, flavorings, and garnishes. Even temperature enters the picture, because some potato salads taste best cold, while others are at their finest warm or at room temperature. Here are the decisions that separate an ordinary potato salad from a great one.

1. Choose the Right Potato

Tradition often calls for waxy potatoes, such as fingerlings, red potatoes, and Yukon Golds. They’re lower in starch than baking potatoes, so they hold their shape when cooked and tossed with dressing. That makes them ideal for warm German-style salads and any version in which you want distinct pieces of potato rather than a softer, creamier texture.
But don’t overlook baking potatoes. They’re higher in starch and become light and fluffy when baked. Start with a fully baked potato, chill it, then dice it. One of the best potato salads I’ve ever tasted comes from Larsen’s Fish Market in Menemsha on Martha’s Vineyard. They start with baked potatoes and add bacon and scallions. Delectable!

2. Put Some Skin in the Game

Personally, I like potatoes with their skins on—more color, more flavor, and more fiber. Scrub them clean with a stiff-bristled brush before cooking. On the other hand, Mrs. Raichlen prefers her potatoes peeled before they become potato salad. Just saying.

3. Dress the Potatoes at the Right Temperature

When Germans make potato salad, they start with hot cooked potatoes. As the potatoes cool, they absorb the dressing, which typically includes vinegar, mustard, oil or bacon fat, and, of course, cooked bacon. Warm or room temperature is the way to serve it.

For a creamy American-style salad, let the potatoes cool fully before adding the mayonnaise dressing. For food safety reasons, mayonnaise should always be kept cold.

4. Choose Creamy or Vinegary

The traditional American version gets its richness from mayonnaise. Hellmann’s, please—unless you come from the South, in which case your mayo of choice may be Duke’s. Central Europeans favor a sharper vinegar-based dressing, with oil or bacon fat supplying the richness.

Smoked Potato Salad

Neither style is automatically better. The important thing is balance. Potatoes are mild and starchy, so the dressing must bring enough acidity, salt, and seasoning to wake them up.

5. Flavor Assertively

As far as I’m concerned, any potato salad needs mustard and vinegar to offset the starchiness of the potatoes. German potato salad demands a touch of sweetness to counterbalance the vinegar and smoky richness of the bacon.

Many people crown their potato salads with a sprinkling of sweet paprika. You, my friend, will add a smoky dimension by sprinkling on pimentón—Spanish smoked paprika. Once you try it, I promise, you’ll never go back to the sweet stuff.

6. Add Crunch and Contrast

All cream and no crunch would make for a boring potato salad. In my house, capers, olives, and cornichon pickles are obligatory, as are chives or scallion greens chopped so finely a sudden sneeze would blow them away.

Sliced celery? It certainly adds crunch, but Mrs. Raichlen doesn’t like celery, so I omit it. I have been known to sneak in slivered celery leaves. Mrs. Raichlen, meanwhile, likes to add diced raw carrot—diced, mind you, not shredded—to maximize the crunch.

The exact embellishments are up to you. The larger point is to give the soft potatoes something crisp, briny, fresh, or sharp to play against.

7. Make It More Substantial

Just because it’s a side dish doesn’t mean potato salad can’t contain protein. Bacon may define German potato salad, while sliced hard-cooked eggs give an American version more heft. Peru’s popular papas a la huancaína pairs potatoes with a piquant sauce made with tangy white cheese and aji amarillo, the country’s fruity yellow chile.

8. Above All, Add Smoke

So what makes a Raichlen potato salad a Raichlen potato salad? You guessed it: smoke and fire. Instead of boiling the potatoes, I smoke-roast them on the grill.

Set up your grill for indirect grilling and heat it to medium-high—about 400°F. Add wood chips or chunks to the fire. Place the potato chunks in a foil pan and toss them with olive oil, salt, and pepper. Smoke-roast until tender, about 40 minutes, stirring from time to time with a wooden spoon.

The potatoes emerge bronzed at the edges and perfumed with wood smoke. From there, you can take them in an American, German, or Peruvian direction.

Four Potato Salads to Try

Drum roll, please. I now give you four of my favorite potato salads—American, German, and Peruvian, with two very different approaches to the German classic. You be the judge as to which is best.

Smoked Potato Salad

This is the creamy American-style potato salad you grew up with—only better. Smoke-roasted potatoes meet mayonnaise, mustard, vinegar, eggs, scallions, olives, capers, cornichons, and fresh herbs. The smoke gives a familiar classic an entirely new dimension.

Smoked Potato Salad

Get The Recipe »

Hot Potato Salad

For my money, one of the best potato salads comes from Germany, where bacon supplies the smoke and vinegar wakes up your taste buds. You assemble the salad while the boiled potatoes are still hot, which helps them absorb the mustardy, sweet-sour dressing. Serve it warm or at room temperature—no mayonnaise required.

Hot Potato Salad

Get The Recipe »

Smoke-Roasted German-Style Potato Salad

This live-fire variation takes German potato salad one step further. Instead of boiling the potatoes, you smoke-roast them with onion, then finish them directly over the fire until browned and crusty. Crisp bacon, vinegar, mustard, horseradish, and a touch of sugar complete the dressing.

Smoke Roasted German Style Potato Salad

Get The Recipe »

Smoke-Roasted Peruvian Potato Salad

Peru gives us one of the world’s most distinctive potato salads: smoke-roasted potatoes topped with huancaína sauce, a creamy, spicy blend of cheese and aji amarillo. It’s rich, colorful, piquant, and unlike any potato salad you’ll find at the supermarket deli counter.

Smoke Roasted Peruvian Potato Salad

Get The Recipe »

So Which Potato Salad Is Best?

Creamy or vinegary? Warm or cold? Skins on or off? There is no single correct answer. The world’s best potato salad is the one that delivers the right balance of tender potatoes, assertive seasoning, contrasting textures, and enough acidity to keep you coming back for another forkful.

But this much I know: smoke-roast the potatoes instead of boiling them, and your potato salad will taste like the barbecue it accompanies. Once you add smoke and fire, the humble potato salad becomes a star of the show.

Plan your next cook with our full recipe collection—weeknight grills, weekend projects, and special-occasion feasts.

Get Steven’s weekly grilling tips, seasonal recipes, and live-fire ideas in your inbox. Join our Up in Smoke newsletter. Sign up and get a FREE PDF of Steven Raichlen's Best Ribs Recipes Ebook.

Preorder Man On Fire — A Steven Raichlen Memoir. And get some really cool rewards!

Looking for more summer grilling inspiration? Check out our Summer Grilling Guide.

The post How to Make the Best Potato Salad You’ve Ever Tasted—The Secret Is the Smoke appeared first on Barbecuebible.com.

Why You Need to Barbecue a Pork Butt Right Now

Barbecue is simple but it isn’t always easy. Simple because it really requires only 2 ingredients: patience and wood smoke.

As for easy? Well, anyone who’s spent 14 hours barbecuing a brisket—maintaining a steady stream of thin blue smoke and a constant temperature of 250 degrees, powering through the stall, doing the wrap, resting the meat and attempting the carve—you’d never call a perfect brisket easy.

But there is one cut that’s both simple and easy to cook and it’s absolutely forgiving. Cook it high heat or low, fast or slow, and it almost always comes out tender and juicy. It’s also one of barbecue’s big three. Drum roll, please. I give you pork shoulder, aka Boston butt. (More on the curious name in a minute.)

Pork shoulder is definitely easy. You season it with your favorite barbecue rub (mine is my Carolina Pit Powder). Or even just salt and pepper. You put it on your grill or in your smoker. Hell, you can even cook it on the rotisserie. You can cook it low and slow or hot and fast—with charcoal, wood, propane, or even—shhhh—on an electric grill.

Pork shoulders

You can cook it in a few hours, or smoke it for half a day, at temperatures ranging from low to medium, and even high. Thanks to its ample marbling and collagen-rich meat, pork shoulder stays juicy while extended cooking turns it tender enough to shred.

Which brings us to the traditional way to serve pork shoulder in the Carolinas—“pulled,” that is shredded and doused with one of the world’s strangest barbecue sauces. In eastern North Carolina, that sauce consists of vinegar, salt, pepper, and cayenne pepper (sometimes with a whisper of sugar). In western North Carolina, they redden this vinegar sauce with a shot of ketchup.

In South Carolina, pulled or sliced pork is often served with mustard sauce. In Tennessee, you may encounter tomato-based barbecue sauce, while northern Alabama is famous for its mayonnaise-based white sauce.

Pulled pork

But American pork shoulder is just a start. In Germany’s Saarland, cooks marinate pork neck or shoulder steaks with onions and spices, then grill them over a traditional beechwood fire on a swinging grate called a schwenker. In Greece, they perfume it with oregano, paprika, and pepper. In Bali, they blast it with ginger, galangal, lemongrass, and fiery chilies. The truth is pork shoulder is so easy to prepare and forgiving to cook, you can season it with almost anything.

Just the Facts About Pork Butt

  • A whole pork shoulder (14 to 18 pounds) consists of two parts—the Boston butt and the picnic shoulder (also known as the picnic ham). The former is the top part of the shoulder—5 to 8 pounds of rich, luscious meat, with only a shoulder blade to stand in the way of your carving knife. (When properly cooked, which is to say overcooked, you can pull said bone out with your fingers.)
  • The picnic ham is the bottom part of the shoulder, including the top of the leg. The drawback of a picnic ham is its high proportion of skin and bone to meat, which is why I prefer Boston butt. So if Boston butt comes from the shoulder, not the posterior, how did it get its curious name? In ancient times, New England butchers packed salted pork shoulders in barrels, aka “butts.”

    Pork Shoulder

  • When I started out in barbecue, pork was pretty much just pork. Today, connoisseurs choose heritage breeds like Berkshire, Duroc, and Mangalitsa. Berkshire (sometimes sold by its Japanese name, Kurobuta—literally “black pig”), for example, boasts richly flavored, well-marbled, dark-pink meat that makes commodity pork taste downright bland.
  • Most of the pork shoulder you buy today comes with the skin removed. Otherwise, trim it off with a paring knife and deep-fry it to make cracklings. (Prolonged grilling or smoking makes the skin leathery.)
  • Pork is safe to eat at 145°F followed by a three-minute rest, but pork butt usually needs to reach approximately 195°F to 205°F before its connective tissue has softened enough for easy pulling.
  • Chase the smoke ring. Smoke a pork shoulder low and slow in the presence of wood smoke, and you wind up with a pink ring just below the surface—the coveted smoke ring. No, it doesn’t mean that the meat is undercooked. The pigmentation occurs naturally—think of it as the red badge of barbecue honor.
  • Finally, the traditional way to serve pork shoulder in the American South is chopped with a cleaver or shredded with meat claws or your fingers. Elsewhere on Planet Barbecue, pork shoulder—particularly boneless shoulder—is served sliced.

4 Pork Butt Recipes to Try Right Now

North Carolina Pulled Pork

Start with the American classic: pork shoulder seasoned simply with salt, pepper, and paprika, then smoke-roasted over hickory until tender enough to pull apart with your fingers. A thin, sharp vinegar sauce keeps the meat moist without overwhelming the smoke. Serve it piled on a bun with vinegar-dressed cabbage for the full North Carolina experience.

North Carolina Pulled Pork

Get The Recipe »

3-2-1 Pork Shoulder

You know the 3-2-1 method for ribs. Here, the same idea turns a pork shoulder into pulled pork in three stages: three hours in the smoke, two hours tightly wrapped, and one final hour unwrapped to firm the bark. The result is smoky, crusty, and tender, with a cooking time that’s easy to remember. Serve it with horseradish poppy seed slaw and chipotle molasses barbecue sauce.

3-2-1 Pork Shoulder

Get The Recipe »

Whiskey-Brined Pork Shoulder

This pork shoulder gets a 24-hour bath in a brine of whiskey, brown sugar, and salt before it ever reaches the smoker. Once the smoke has built a dark exterior, the pork is transferred to a pan with apple cider and another splash of whiskey to finish by smoke-braising. The result is moist, tender pork with a subtle sweetness and unmistakable whiskey character.

Whiskey-Brined Pork Shoulder

Get The Recipe »

Korean Pulled Pork

Pulled pork takes a trip to Seoul in this sweet, salty, spicy, and umami-rich variation. The shoulder marinates in gochujang before being smoked until dark and crusty, then gets pulled and mixed with Korean barbecue sauce. Pile it onto sesame buns and top it with kimchi, sriracha, or sweet chili sauce. This is pulled pork with serious firepower.

Korean Pulled Pork

Get The Recipe »

Frequently Asked Questions

Is pork butt the same as pork shoulder?

Pork butt is one part of the pork shoulder. A whole shoulder consists of the Boston butt at the top and the picnic shoulder below it. The Boston butt contains more intramuscular fat and less skin and bone, making it the preferred cut for pulled pork. Recipes and meat counters often use the names pork butt, Boston butt, and pork shoulder interchangeably, so check the label or ask your butcher when in doubt.

What temperature should pork butt reach for pulled pork?

Pork is safe to eat at 145°F followed by a three-minute rest, but that doesn’t mean a pork butt is ready to pull. For tender, easily shredded pork, cook it to an internal temperature of approximately 195°F to 205°F. The thermometer is only part of the test: The shoulder blade should pull out easily, and a thermometer probe should slide into the meat with little resistance.

How long does it take to barbecue a pork butt?

Cooking time depends on the size of the pork butt, the temperature of your grill or smoker, and whether you wrap the meat. A smaller shoulder cooked at 275°F to 325°F may be ready in four to six hours, while a larger one smoked low and slow can take eight hours or more. Cook to tenderness and internal temperature, not strictly by the clock, and leave extra time for resting before pulling.

Plan your next cook with our full recipe collection—weeknight grills, weekend projects, and special-occasion feasts.

Get Steven’s weekly grilling tips, seasonal recipes, and live-fire ideas in your inbox. Join our Up in Smoke newsletter. Sign up and get a FREE PDF of Steven Raichlen's Best Ribs Recipes Ebook.

Preorder Man On Fire — A Steven Raichlen Memoir. And get some really cool rewards!

Looking for more summer grilling inspiration? Check out our Summer Grilling Guide.

The post Why You Need to Barbecue a Pork Butt Right Now appeared first on Barbecuebible.com.

54+ Tailgating Recipes for Game Day

By: Charlie
27 July 2026 at 21:41

Tailgating food doesn’t need to be fancy, but it should be good. Whether you’re in the parking lot before the game, hosting a backyard watch party, or just getting a group of friends together for the afternoon, the food is half the reason people show up. I’ve put together this list of my favorite tailgate […]

The post 54+ Tailgating Recipes for Game Day appeared first on Simply Meat Smoking.

❌
❌