
Normal view

There are new articles available, click to refresh the page.
Before yesterdayCooking: BBQ

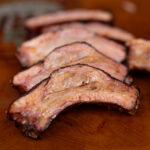
Perfect Baby Back Ribs

28 August 2026 at 13:14

Perfect Baby Back Ribs

I’ve cooked baby back ribs just about every way you can cook them. Different smokers, different seasonings, different sauces… and there’s really no one right way to do it. You can take just about any good rib recipe and make some great ribs.

What makes the biggest difference is knowing what to look for along the way.

It starts with picking out a good rack and trimming it up so it cooks evenly. Then you gotta know when the bark is set and the ribs are ready to wrap, what tender ribs should actually feel like, and when it’s time to get them off the pit. And one of the biggest things I’ve learned is to give ribs a good hold once they’re tender. That little bit of time lets everything settle down before you put on the final glaze.

For these ribs, I’m using Tyson Baby Back Ribs from Walmart and keeping the flavors pretty simple. But that’s really the point. Change the seasoning, change the sauce, cook them on whatever smoker you’ve got. If you pay attention to these little things during the cook, you’ll get tender, juicy ribs with that beautiful mahogany finish every time.

WHAT MALCOM USED IN THIS RECIPE:
Print
baby back ribs

Perfect Baby Back Ribs


5 Stars 4 Stars 3 Stars 2 Stars 1 Star

No reviews

Description

These baby back ribs are smoked at 275°F until the bark is set, wrapped until tender, then given a proper hold before finishing with a final glaze. It’s the little things along the way that give you tender, juicy ribs with a beautiful mahogany finish.


Ingredients


Instructions

  • PREP THE RIBS
    • Remove the membrane from the back of each rack. Square up the ends and trim away any loose fat or anything that doesn’t look like it will cook up appetizing. Squaring up the rack makes the finished ribs look better, and those thin ends tend to dry out during the cook anyway.
  • SEASON THE RIBS 
    • Apply a medium-heavy coat of Killer Hogs The BBQ Rub to both sides of the ribs. No binder is needed.
  • SMOKE AT 275°F
    • Any smoker will work. Cook the ribs for about 2–2½ hours, but don’t go strictly by time. You’re looking for the rub to fuse into the meat and form a good-looking bark. That’s when they’re ready to wrap.
  • MAKE THE WRAP MIXTURE
    • Combine the melted butter, apple juice, ¼ cup Killer Hogs The BBQ sauce and 1–2 Tablespoons of Killer Hogs The BBQ Rub.
  • WRAP THE RIBS
    • Place each rack meat-side down on a sheet of foil. Pour half of the wrap mixture over each rack. Fold the foil over the ribs and tuck in the ends to seal.
  • COOK UNTIL TENDER
    • Return the wrapped ribs to the smoker. After about 1½ hours, start checking for tenderness. The ribs should feel very flexible through the foil, you should see some disintegration around the bones, and the internal temperature should be around 204–208°F.
  • VENT AND HOLD
    • Open the foil and allow the steam to escape, then wrap the ribs back up and place them in a dry cooler for 1 hour.
    • Burp the cooler about every 15 minutes to release excess heat and steam. This gives the meat a chance to calm down and reabsorb some of the liquid from the wrap.
  • GLAZE & SET
    • Remove the ribs from the foil. Brush the bottom and top with a layer of Killer Hogs The BBQ Sauce and finish with a light dusting of Killer Hogs The BBQ Rub.
    • Return the ribs to the smoker for 15–20 minutes, just long enough for the sauce to caramelize and set.

Notes

  • Picking a good rack: When I’m buying Tyson Baby Back Ribs, I look for racks that are as even as possible, with straight bones and a tight vacuum seal. Starting with a good, uniform slab helps the ribs cook more evenly.
  • Don’t cook by the clock alone: The times are a guide. Look at the bark before wrapping and use the feel of the ribs, the bones and internal temperature to determine when they’re tender.
  • Make the wrap your own: Butter, apple juice and BBQ sauce is the combination used here, but the wrap can be changed to suit the flavor you want. Think about adding some combination of fat, sweet, vinegar and heat. Whatever you use, adding a little more of your original seasoning to the wrap helps reinforce the flavor you started with.
  • Don’t skip the hold: Giving the ribs an hour in a dry cooler after they’re tender lets them settle down and reabsorb some of that flavorful liquid before the final glaze.

Malcom Reed
Connect on Facebook
Follow me on TikTok
Subscribe to my YouTube Channel
Follow me on Instagram
Buy Killer Hogs Products Here

The post Perfect Baby Back Ribs appeared first on HowToBBBQRight.

The Ultimate Guide to Grilling Fish—Without Sticking, Drying Out, or Falling Apart!

People often ask me what my favorite food is to grill in the summer. You might be surprised to hear it’s not steak or ribs or pork loin. No, my number one favorite grill food this time of year is fish—especially swordfish. And nowhere does it taste better—or grill better—than at my summer home on Martha’s Vineyard.

Fish on the grill. Four words that strike terror into the hearts of even experienced grillers. For as much as grilling endows fish with incredible smoky succulence, there’s a lot that can go wrong. Will it stick to the grate? Will it fall apart when you turn it? Will the high heat of the fire dry it out?

The Ultimate Guide to Grilling Fish

Well, grilling fish is easy, but it isn’t always simple. The secret is choosing the right grilling method for the particular fish you’re cooking.

Choose the Right Grilling Method for Your Fish

Direct Grill It

Direct grilling—cooking the fish directly over the fire—is ideal for firm, meaty fish steaks, such as swordfish, tuna, and salmon. These fish have enough structure to stand up to high heat and flipping without falling apart.

Start with a hot, clean, well-oiled grill grate. Pat the fish dry and brush it lightly with oil before it goes on the grill. Once the fish hits the grate, leave it alone long enough to develop a good sear. When properly browned, it will release more readily from the grate. Turn it with a thin-bladed spatula and, whenever possible, flip it only once.

Swordfish is particularly well suited to this technique—one reason it remains one of my favorite fish to grill.

Try it:

Sicilian Grilled Swordfish with Salsa Verde

These meaty swordfish steaks are seasoned with lemon and rosemary, coated with breadcrumbs, and direct grilled until golden brown. A lively salsa verde of parsley, lemon, garlic, and red pepper flakes finishes the dish.

Sicilian Grilled Swordfish with Salsa Verde

Get The Recipe »

Indirect Grill It

Indirect grilling is ideal for whole fish, like snapper or salmon. Instead of positioning the fish directly over the fire, you cook it next to the heat with the grill covered. Think of your grill as a smoky outdoor oven.

This gentler method cooks the fish evenly from edge to center and is especially useful for larger fish that need more time over the fire. Brush the fish with oil, season it inside and out, and place it away from the direct heat. For an extra blast of wood smoke, toss a few wood chunks or chips onto the fire.

Try it:

Whole Grilled Snapper in Pipian Sauce

Whole snapper is stuffed with onion, garlic, cilantro, and poblano chile, then indirect grilled over wood smoke. Serve it with pipian, a Mexican sauce made with grilled vegetables and pumpkin seeds.

Whole Grilled Snapper in Pipian Sauce

Get The Recipe »

Smoke It

Few foods take to wood smoke as enthusiastically as oily fish. Salmon, bluefish, and whitefish have enough natural fat to stay moist as they cook, while soaking up all that wonderful smoky flavor.

For the best results, brine or cure the fish first, then let the surface dry before it goes into the smoker. Alder is the classic wood for salmon, but apple, cherry, and other mild hardwoods work beautifully, too. Serve the fish hot from the smoker, or chill it and enjoy it later.

Try it:

Maple-Cured and Smoked Salmon

This salmon gets a New England twist with a cure of maple sugar, salt, black pepper, and lemon zest, followed by a drizzle of maple syrup. Smoking adds another layer of flavor to the rich fish.

Maple-Cured and Smoked Salmon

Get The Recipe »

Griddle It

For delicate fish fillets—think sole, flounder, or black bass—a griddle or plancha can be your best friend. You get the intense heat and sizzling crust of the grill without the open spaces between the bars for the fish to stick to—or fall through.

Preheat the griddle until hot, then slick it lightly with oil. Lay on the fish and let it sear undisturbed before turning it with a thin-bladed spatula. The broad, solid cooking surface makes this one of the easiest ways to grill fragile fish and still get plenty of live-fire flavor.

Try it:

Grill-Blackened Tuna with Cajun Remoulade

Thick ahi tuna steaks are coated with Cajun spices and seared on a screaming-hot plancha, cast-iron skillet, or griddle. The goal: an electrifying blackened crust with the center still beautifully rare, served with Cajun remoulade.

Grill-Blackened Tuna with Cajun Remoulade

Get The Recipe »

Use a Grill Basket

A grill basket is cheap insurance for fish that has a tendency to stick, tear, or fall through the grate. It’s particularly useful for whole trout and small snapper, as well as delicate fillets like halibut and turbot.

Oil the basket well before adding the fish. Once it’s clamped securely inside, you turn the basket—not the fish. That means no wrestling with a spatula and far less chance of leaving half your dinner stuck to the grill grate. You still get plenty of heat, smoke, and char, but with considerably less drama.

Try it:

Mexican Grilled Trout with Mojo de Ajo

Whole trout are marinated with garlic, onion, celery, cumin, herbs, and sour orange juice, then grilled whole—using a fish basket if you like. Fried garlic sauce spooned over the fish gives it a powerful finish.

Mexican Grilled Trout with Mojo de Ajo

Get The Recipe »

Use a Cedar Plank

Planking is one of the most foolproof ways to grill fish. A cedar plank is ideal for fillets like salmon and striped bass, and because the fish never touches the grill grate, sticking and falling apart cease to be problems.

Set up your grill for indirect grilling. For extra flavor, char one side of the plank over the fire before adding the fish, then place the fish on the charred side and move the plank away from the direct heat. As the cedar plank heats, it perfumes the fish with wood smoke while helping keep it moist.

Try it:

Planked Salmon with Lemon Mustard Glaze

A whole salmon fillet cooks on a cedar plank over indirect heat under a simple glaze of Dijon mustard, mayonnaise, and lemon zest. Serve the fish right on the plank for maximum effect.

Planked Salmon with Lemon Mustard Glaze

Get The Recipe »

Use a Salt Slab

A salt slab turns your grill into a sizzling, mineral-rich plancha. It’s especially well-suited to delicate whole fish, such as snapper, black bass, and porgie, because the fish cooks on a solid surface instead of directly on the grate.

Heat the slab gradually to prevent cracking, then lay the fish right on top. The hot salt gives the exterior a beautiful sear while gently seasoning the fish as it cooks. And because there are no grill bars involved, there’s nothing for the delicate flesh to fall through.

Try it:

Salt Slab-Grilled Rockfish with Melon Mint Relish

A whole rockfish cooks directly on a preheated Himalayan salt slab, where it sizzles and browns while being basted with garlic butter. A fresh melon-mint relish provides a cool counterpoint.

Salt Slab-Grilled Rockfish with Melon Mint Relish

Get The Recipe »

Grill It in Leaves

Wrapping fish in leaves is an age-old grilling technique found throughout Asia, Latin America, and the Caribbean. It’s particularly useful for delicate fish: the leaves keep the flesh off the grate, trap moisture, and perfume the fish with an herbaceous smoke as they char over the fire.

Banana leaves are especially good for the job. Soften fresh leaves briefly over the grill, wrap the seasoned fish inside, and secure the package with toothpicks. The leaves take the punishment of the fire while the fish steams and smokes inside. No sticking. No falling apart. And when you open the package at the table, you get a blast of fragrant steam.

Try it:

Halibut Grilled in Banana Leaves with Lemongrass and Thai Basil

Delicate halibut fillets are coated with a fragrant paste of lemongrass, Thai basil, garlic, cilantro, chiles, and sesame oil, then wrapped in banana leaves and grilled. The leaves protect the fish while adding an herbaceous smoke flavor.

Halibut Grilled in Banana Leaves with Lemongrass and Thai Basil

Get The Recipe »

Grill It on a Stick

Sometimes the simplest grilling equipment is a sharpened stick and a good wood fire. This primitive method is perfect for camping, where fish can be positioned beside the embers and cooked by radiant heat rather than directly over the flames.

Thread the fish securely onto a sturdy stick or stake, then angle it toward the fire. Turn or reposition it as needed to cook both sides. Moving the fish closer to or farther from the embers gives you surprisingly precise control over the heat—and there’s no grill grate for the fish to stick to.

Try it: Salmon on a Stick

Know Exactly When It’s Done

There’s a fine line between perfectly cooked fish and fish that’s dry enough to make you reach for the tartar sauce. Don’t guess. Use an instant-read thermometer.

Whole fish: Insert the probe into the thickest part of the flesh just above the bone.

Fish steaks: Insert the probe through the side to the center.

Most fish: Cook to an internal temperature of 140° to 145°F.

Blue tuna: 100° to 110°F.

Rare tuna: 120° to 125°F.

Medium-rare tuna: 130° to 135°F.

Tuna plays by different rules. However you cook it, the center should stay gloriously rosy.

Fish, Fire, and Summer

Grilling fish doesn’t have to strike fear into the heart of even the most seasoned griller. Once you learn how to match the fish to the fire, the rest gets a whole lot easier.

The payoff? Fish that’s moist, smoky, succulent, and beautifully browned—the kind of meal that reminds you why fish belongs over a live fire in the first place.

Want to go deeper on the craft? Explore our grilling techniques and how-to guides for ribs, steak, chicken, seafood, and more.

Get Steven’s weekly grilling tips, seasonal recipes, and live-fire ideas in your inbox. Join our Up in Smoke newsletter. Sign up and get a FREE PDF of Steven Raichlen's Best Ribs Recipes Ebook.

Preorder Man On Fire — A Steven Raichlen Memoir. And get some really cool rewards!

Looking for some fall grilling inspiration? Check out our Fall Grilling Guide.

The post The Ultimate Guide to Grilling Fish—Without Sticking, Drying Out, or Falling Apart! appeared first on Barbecuebible.com.

32+ BBQ Party Food Ideas – Mains, Sides & Apps For A Crowd

By: Charlie
12 August 2026 at 22:11

There’s something about firing up the smoker with a full backyard of people that never gets old — it’s one of my favorite excuses to cook all day. Whether you’re throwing a birthday bash, a long weekend cookout, or just using any excuse to get the smoker going, a good spread makes the whole thing. […]

The post 32+ BBQ Party Food Ideas – Mains, Sides & Apps For A Crowd appeared first on Simply Meat Smoking.

❌
❌